

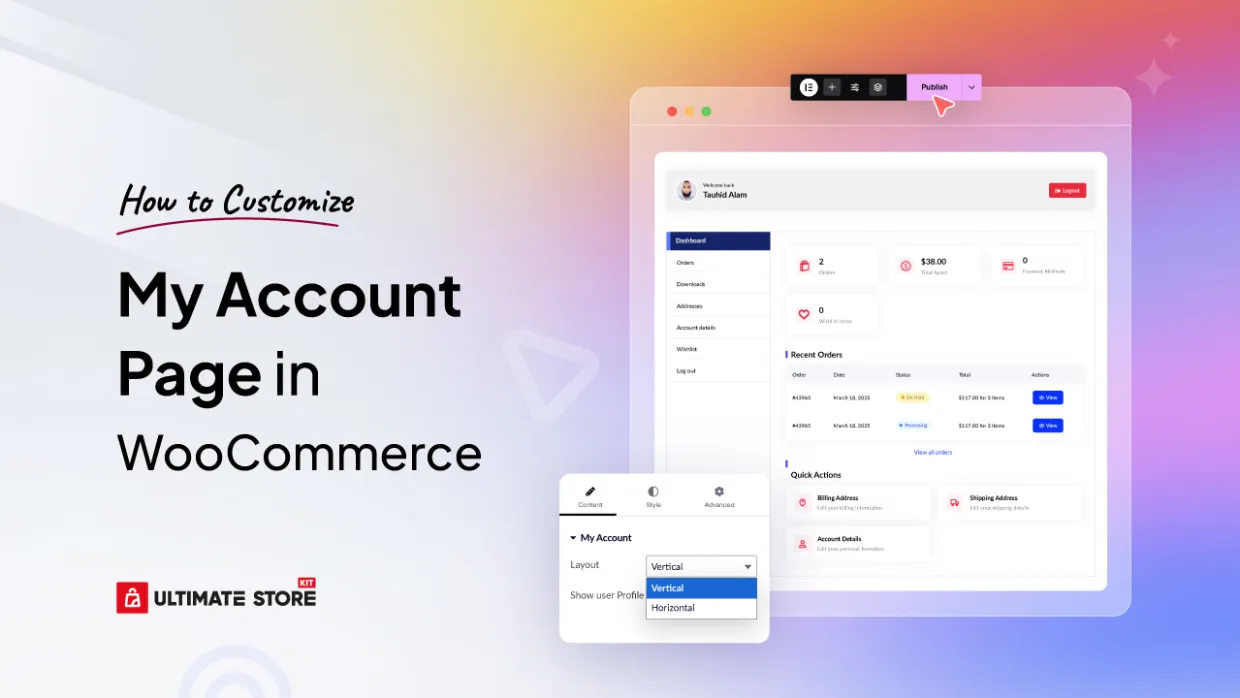
If you’re running a WooCommerce store, the “My Account” page plays a crucial role in your customer experience. It acts as the central hub where users track orders, manage downloads, update account details, and more.
By default, WooCommerce provides a basic “My Account” page. While functional, it lacks design flexibility and offers limited options for branding or customization.
So, what’s the best way to customize the WooCommerce account page?
The most powerful, beginner-friendly, and design-flexible option is to use a WooCommerce account page builder plugin. One of the most advanced and recommended tools for this is Ultimate Store Kit, a plugin that enables full frontend customization of the WooCommerce “My Account” page using Elementor.
Let’s dive into the complete process of transforming your basic WooCommerce account page into a professional, branded user experience.
Step 1: Prepare Theme Builder Pages
The foundation of a well-customized WooCommerce account page lies in setting up the necessary theme builder pages. This step is crucial because it establishes the individual components that will make up your complete account experience.
To start customizing your account page with Ultimate Store Kit, you’ll need to install Elementor (either the free or paid version) and the Ultimate Store Kit plugin from your WordPress dashboard.
Once these are set up, you’ll be ready to edit and create custom fields, layouts, and designs for your account page.
Creating Templates Through Ultimate Store Kit
Navigate to your WordPress dashboard and follow these steps:
- Access Template Builder: Go to Ultimate Store Kit > Template Builder from your WordPress dashboard menu.
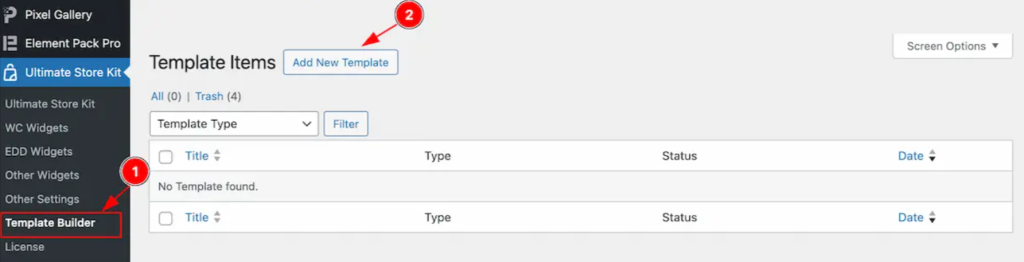
- Add New Templates: Look for the “Add New Template” button and click it. This will open a popup window where you can select the specific pages you want to create.
You’ll need to create the following essential templates for a complete account page experience:
Dashboard Page Setup
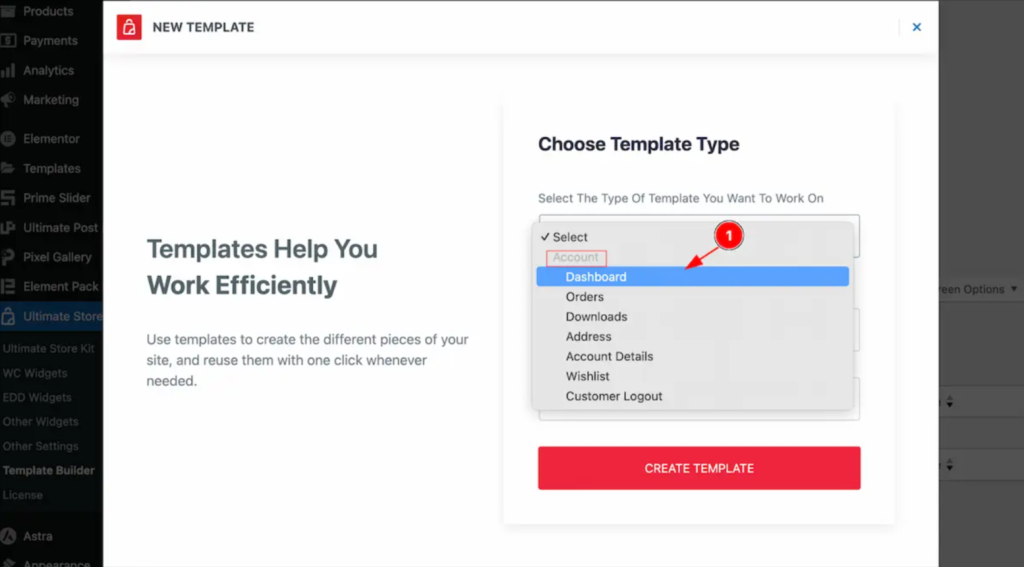
- Select “Dashboard” from the template type options
- Set a descriptive name for your template (e.g., “My Account Dashboard”)
- Ensure the status is set to “Active”
- Click “Create Template” to generate your dashboard page
Orders Page Configuration
- Choose “Orders” from the available template options

- Name your template appropriately (e.g., “Customer Orders”)
- Set the status to “Active”
- Create the template by clicking the corresponding button
Downloads Page Setup

- Select “Downloads” as your template type
- Provide a clear name for the template
- Activate the template by setting its status to “Active”
- Complete the creation process
Address Page Creation

- Choose “Address” from the template options
- Name your template for easy identification
- Set the status to “Active”
- Generate the template

Account Details Page

- Select “Account Details” as your template type
- Assign an appropriate name to the template
- Ensure it’s set to “Active” status
- Create the template

Wishlist Page Development

- Choose “Wishlist” from the available options
- Name your template accordingly
- Set the status to “Active”
- Complete the template creation
Customer Logout Page

- Select “Customer Logout” as your template type
- Provide a suitable name for the template
- Activate the template
- Finalize the creation process
Each of these templates serves a specific purpose in your customer’s account journey, providing them with organized access to their orders, downloads, account information, and other essential features.
Step 2: Enable the My Account Page Widget
Before you can start using the powerful My Account Page widget from Ultimate Store Kit, you need to ensure it’s properly enabled in your WordPress installation.
Accessing Widget Settings
- Navigate to Plugin Dashboard: From your WordPress dashboard, go to Ultimate Store Kit Plugin dashboard.
- Access WC Widgets Tab: Look for and click on the “WC Widgets” tab within the plugin interface.
- Locate the Widget: Search for “My Account Page Widget” in the available widgets list.
- Enable the Widget: Toggle the switch to enable the My Account Page Widget.
- Save Changes: Click the “Save Settings” button to apply your changes.

This step is essential because it activates the widget functionality and makes it available for use within your Elementor editor.
Step 3: Insert the My Account Page Widget in Elementor
Now that you’ve prepared your templates and enabled the necessary widget, it’s time to actually implement the My Account Page widget on your desired page.
Adding the Widget to Your Page
- Open Elementor Editor: Navigate to the page where you want to display your custom account interface and open it with the Elementor Editor.
- Add New Element: Click the “+” (Add Element) icon in the Elementor interface.
- Search for Widget: Type “My Account Page” in the search bar to locate the specific widget.
- Implement the Widget: Simply drag and drop the My Account Page widget onto your page layout.

- Publish Your Changes: After inserting the widget, you don’t need to make immediate edits. Click the “Publish” button to make your changes live.

The beauty of this widget is that it comes pre-configured with sensible defaults, so your account page will be functional immediately upon insertion.
Step 4: Configure Layout and Content (Content Tab)
The Content Tab is where you’ll define the core functionality and structure of your account page. This section provides comprehensive options to manage and customize how your account page behaves and appears to users.
My Account Section Configuration
Navigate to Content > My Account to access the primary configuration options.
Horizontal Layout Options
When you select the horizontal layout:

- Layout Setting: Choose “Horizontal” to display the navigation tabs in a horizontal arrangement
- Alignment Control: Position your content using Left, Center, or Right alignment options
- User Profile Header: Enable this option to display a personalized header section with user information
Vertical Layout Configuration
For a vertical layout approach:
- Layout Selection: Choose “Vertical” to position navigation elements in a sidebar-style arrangement
- Navigation Alignment: Set the position of your navigation menu to Left, Center, or Right
- Profile Header Display: Toggle the user profile header visibility based on your design preferences
The layout choice significantly impacts user experience. Horizontal layouts work well for sites with fewer account sections, while vertical layouts are ideal for stores with extensive account functionalities.
Step 5: Style the My Account Page (Style Tab)
The Style Tab is where the magic happens – this is where you’ll transform your functional account page into a visually stunning, brand-aligned experience that resonates with your customers.
My Account Header Section Styling
Access Style > My Account Header to customize the header appearance:
Background and Border Configuration

- Background Type: Choose from solid colors, gradients, or images for your header background
- Border Type: Select from various border styles (solid, dashed, dotted, double)
- Border Width: Adjust the thickness of your borders for the desired visual impact
- Border Color: Choose colors that complement your brand palette
- Border Radius: Create rounded corners for a modern, polished appearance
- Padding and Margin: Control spacing for optimal visual hierarchy
- Box Shadow: Add depth and dimension with customizable shadow effects

Avatar Customization
Fine-tune the user avatar display:

- Size Control: Adjust avatar dimensions to fit your design
- Border Styling: Apply borders with various styles and colors
- Border Radius: Create circular or rounded avatar displays
- Box Shadow: Add subtle shadows for enhanced visual appeal
- Gap Management: Control spacing between avatar and accompanying text

User Information Styling
Customize how user information appears:

- Color Selection: Choose text colors that ensure readability
- Typography Control: Select fonts, sizes, and weights that match your brand
- Margin Adjustments: Fine-tune spacing for optimal layout
Logout Button Design

Style the logout functionality:
- Text Color: Ensure the logout button stands out appropriately
- Typography: Choose readable and brand-consistent fonts
- Background Type: Select colors or gradients for the button background
- Border Configuration: Add borders that complement your overall design
My Account Wrapper Section
Navigate to Style > My Account Wrapper for overall container styling:

- Background Customization: Set colors, gradients, or patterns for the main wrapper
- Border Management: Choose border types, widths, and colors
- Border Radius: Create consistent rounded corners throughout
- Padding Control: Manage internal spacing for content breathing room
- Margin Settings: Control external spacing and positioning
- Space Between Elements: Adjust gaps between different sections

Account Navigation Section
Access Style > Account Navigation to customize the navigation experience:

Navigation Container Styling
- Background Options: Choose colors that make navigation clear and accessible
- Border Configuration: Add definition with strategic border use
- Padding and Gap Management: Ensure comfortable spacing for user interaction

Nav Items Customization
Normal State Styling:

- Background Colors: Set default colors for navigation items
- Text Colors: Ensure excellent readability and contrast
- Border Design: Add subtle borders for definition
- Typography: Choose fonts that are both attractive and functional
- Padding: Provide comfortable click targets

Hover State Effects:

- Color Transitions: Create engaging hover effects with color changes
- Background Shifts: Implement smooth background color transitions
- Border Modifications: Adjust borders for interactive feedback
Active State Indicators:

- Distinctive Colors: Make the current page clearly identifiable
- Background Emphasis: Use contrasting backgrounds for active states
- Border Highlights: Implement visual cues for current location
Account Content Section
Style the main content area through Style > Account Content:

Text and Color Management

- Text Color: Ensure body text is easily readable
- Title Color: Make section titles stand out appropriately
- Heading Color: Create visual hierarchy with distinctive heading colors
- Stats Color: Highlight important statistics and numbers
- Stats Icon Styling: Customize icon colors and backgrounds for visual appeal
Link Styling

- Link Color: Choose colors that indicate interactivity
- Link Hover Color: Provide feedback for user interactions
- Background Options: Set backgrounds that enhance content readability
Layout and Spacing

- Border Configuration: Add structure with thoughtful border use
- Border Radius: Maintain design consistency with rounded corners
- Padding Management: Create comfortable reading experiences
- Spacing Control: Manage distance from navigation elements
- Typography: Ensure content is both beautiful and functional

Table Section Styling
For order history and other tabular data, access Style > Table:

Overall Table Design
- Border Width and Color: Create clear table structure
- Consistent Styling: Ensure tables match your overall design theme
Table Header Customization

- Header Colors: Make column headers clearly distinguishable
- Background Colors: Use contrast to separate headers from content
- Padding: Provide comfortable spacing within header cells
- Typography: Choose fonts that emphasize the header hierarchy
Table Body Styling

- Text Colors: Ensure data is easily readable
- Link Colors: Maintain consistency with your site’s link styling
- Link Hover Effects: Provide interactive feedback
- Background Colors: Use subtle backgrounds for better readability
Action Button Configuration
Customize buttons throughout the account area:
Normal State Styling

- Color Choices: Select colors that encourage action
- Background Types: Choose solid colors or gradients
- Border Design: Add definition and professionalism
- Border Radius: Maintain consistency with your design language
- Padding: Create buttons that are comfortable to interact with
- Typography: Choose fonts that convey the right tone

Hover State Effects

- Color Transitions: Create engaging interactive feedback
- Background Changes: Implement smooth hover transitions
- Border Modifications: Adjust borders for enhanced interactivity
Address Section Customization
Style address-related elements through Style > Address:
Address Information Display

- Edit Link Colors: Make editing options clearly visible
- Hover Effects: Provide feedback for interactive elements
- Typography: Choose fonts that maintain readability
Address Info Styling

- Address Text Colors: Ensure customer information is clearly readable
- Typography Management: Select fonts appropriate for address display
Divider Customization

- Divider Colors: Create subtle separation between address sections
- Background Types: Choose backgrounds that enhance section division
- Border Configuration: Add structure with appropriate borders
- Padding and Spacing: Manage visual separation effectively

Form Fields Section
Customize forms throughout the account area via Style > Form Fields:
Form Title Styling

- Color Selection: Make form titles clearly visible
- Typography: Choose fonts that guide users effectively
Field Configuration

- Label Colors: Ensure form labels are easily readable
- Label Typography: Select fonts that provide clear guidance
- Input Colors: Choose colors that encourage form completion

- Input Background Colors: Create comfortable input experiences
- Border Radius: Maintain design consistency in form elements
- Input Padding: Provide comfortable typing experiences
- Typography: Ensure text within inputs is clearly readable
Submit Button Design
Finalize your forms with professional submit buttons:
Normal State Configuration

- Text Colors: Choose colors that encourage action
- Background Types: Select backgrounds that stand out appropriately
- Border Design: Add professionalism with thoughtful borders
- Border Radius: Maintain consistency with your overall design
- Padding: Create buttons that are comfortable to click
- Typography: Choose fonts that convey confidence and clarity

Hover State Effects

- Color Transitions: Implement engaging hover feedback
- Background Changes: Create smooth interactive experiences
- Border Modifications: Enhance interactivity with border changes
Frequently Asked Questions
Can I customize the WooCommerce account page for free?
While WooCommerce provides basic account page functionality, truly professional customization requires additional tools. Ultimate Store Kit offers advanced customization options that go far beyond what’s possible with free solutions, providing professional templates, advanced styling controls, and seamless integration capabilities.
How do I add custom fields to the WooCommerce account page?
With Ultimate Store Kit, you can easily add custom fields through the Elementor interface. The plugin provides intuitive drag-and-drop functionality that allows you to add, modify, and style custom fields without any coding knowledge.
What is the shortcode for the WooCommerce account page?
The standard WooCommerce account page uses the
Login
Register
How do I edit the WooCommerce my account page with Elementor?
Ultimate Store Kit seamlessly integrates with Elementor, providing specialized widgets designed specifically for WooCommerce account pages. Simply install both Elementor and Ultimate Store Kit, enable the My Account Page widget, and use the drag-and-drop interface to create your custom layout.
Conclusion
A well-designed account page is crucial for customer satisfaction and retention in any WooCommerce store. It serves as the central hub where customers manage their orders, update their information, and interact with your brand on a personal level.
By using powerful tools like Ultimate Store Kit, the process of creating professional, branded account pages becomes accessible and flexible – especially for store owners who don’t have coding experience. The plugin’s comprehensive feature set, combined with its intuitive interface, allows you to create account pages that truly reflect your brand and provide exceptional user experiences. HI