

If you’re looking for a guide about how to build a WooCommerce store from scratch in 2025, you’ve come to the right place.
With WooCommerce, you have full control over your store’s design, functionality, and scalability for your e-commerce customer retention. Therefore, we will utilize this opportunity to open an e-commerce store from scratch, step by step.
To build a WooCommerce store, start with installing the WooCommerce plugin, configure basic settings, add your products. Then, simply customize your store design and complete with payment, shipping, and product management features. However, the easiest and advanced way to build a WooCommerce Store is using a woo store builder plugin.
So let’s dive in and build your WooCommerce success!
Key takeaways for building a WooCommerce store
This guide will walk you through the process of building a high-level WooCommerce website from the ground up using simple, straightforward steps. Let’s start by outlining the key takeaways.
- Step 1: Install and Activate WooCommerce
- Step 2: Configure Your WooCommerce Store
- Step 3: Add Products to Your Store
- Step 4: Design and Customize Your WooCommerce Store
Step 1: Install and Activate WooCommerce
Your first step is to go through the eCommerce installation and setup process. Before moving forward, you’ll need to familiarize yourself with the essential configurations to ensure everything runs smoothly.
Install WooCommerce
To install WooCommerce on your WordPress site:
- Go to Plugins > Add New in your WordPress dashboard.
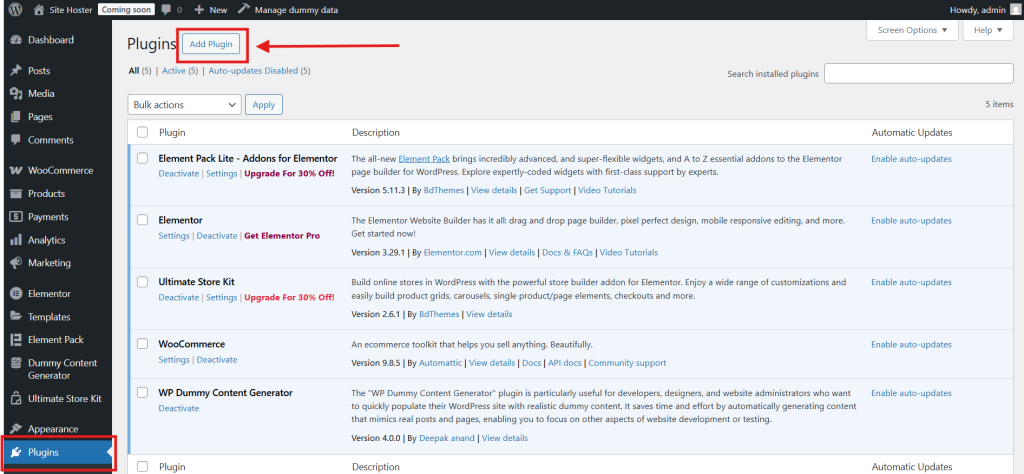
- Enter “WooCommerce” in the search bar.
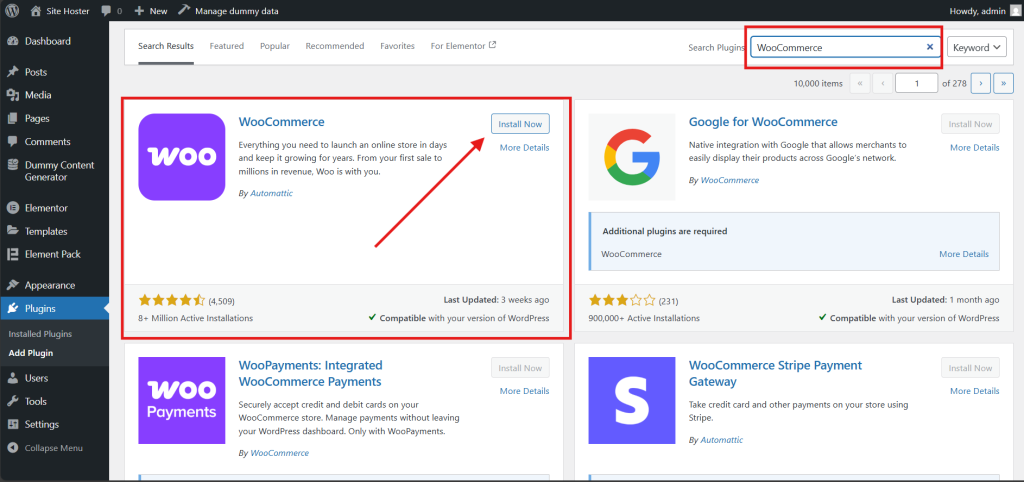
- Click Install Now.
Activate the plugin
After installing WooCommerce, follow these steps to activate it:
- Once the installation is complete, click the Activate button.
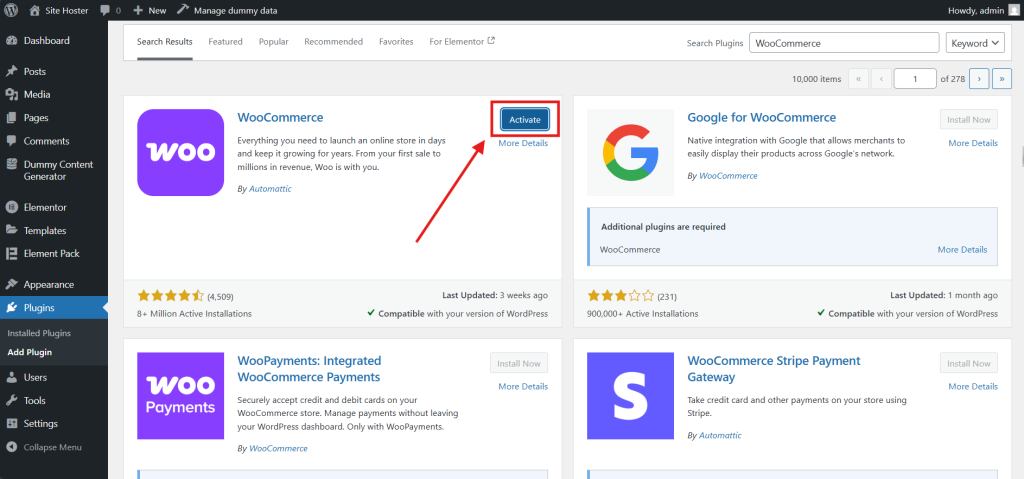
- WooCommerce will now be enabled, and you’ll be guided through the setup wizard to configure your store.
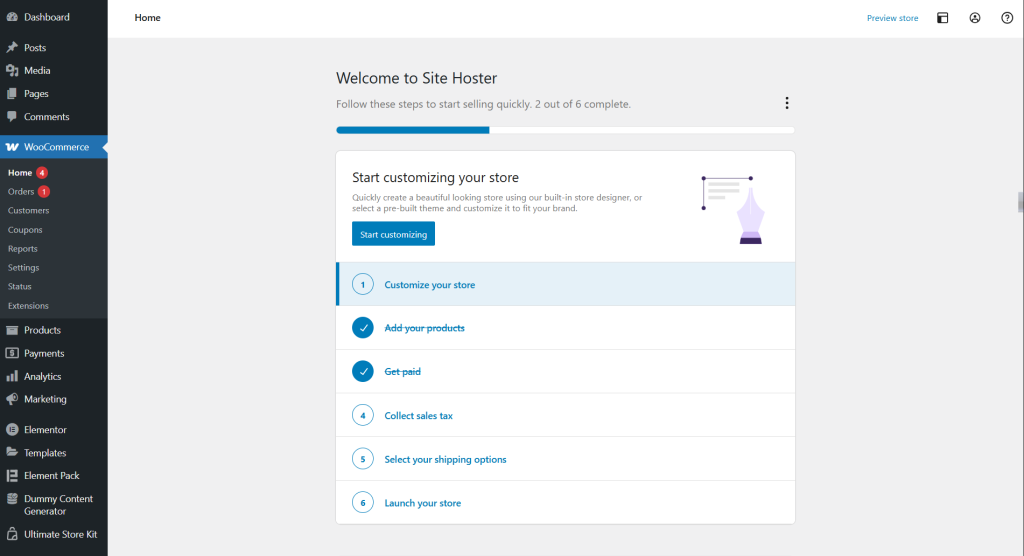
Run the setup process
The WooCommerce Setup Wizard helps you configure key settings for your store.
Once you activate WooCommerce, it will guide you through essential setup steps, including Store Details, Industry & Product Type, Business Details, Payment Setup, Shipping Options, and Recommended Plugins.
Step 2: Configure Your WooCommerce Store
Now I’m going to give you a step-by-step guide for how to configure your WooCommerce store with payment, shipping, and tax settings:
Set Up Your WooCommerce Store
Here we need to set some basic information required for our store. So, at the beginning
- Go to WooCommerce > Settings in your WordPress dashboard.
- Fill in your store address, currency, and selling locations.

- Adjust general settings based on your business needs.
Configure Payment Options
You’ll now set up the payment system, choosing preferred methods, integrating gateways, and adjusting settings for secure and hassle-free transactions.
- Navigate to WooCommerce > Settings > Payments.
- Enable payment methods like PayPal, Stripe, or direct bank transfer.
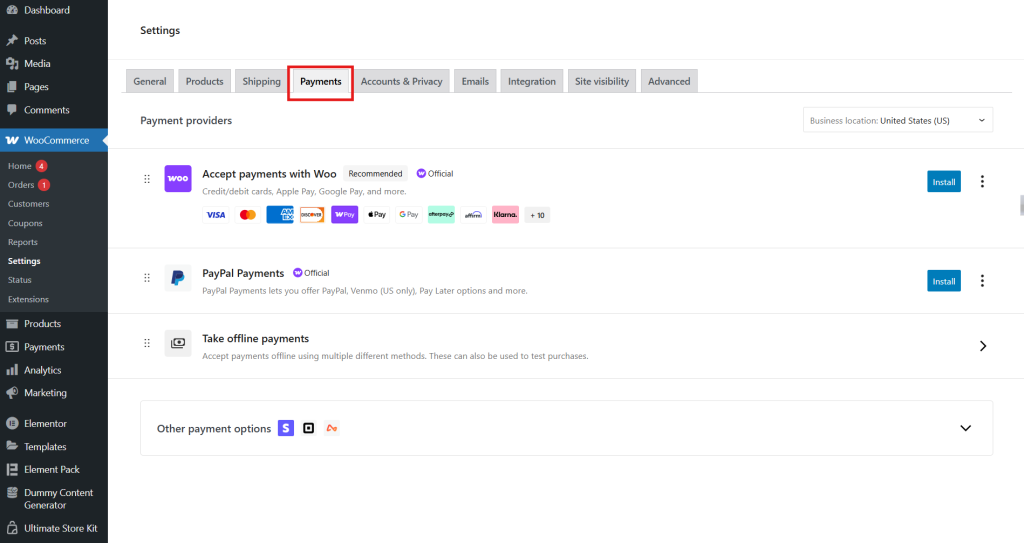
- Set up payment gateway credentials and processing options.
- Test payments to ensure transactions work smoothly.
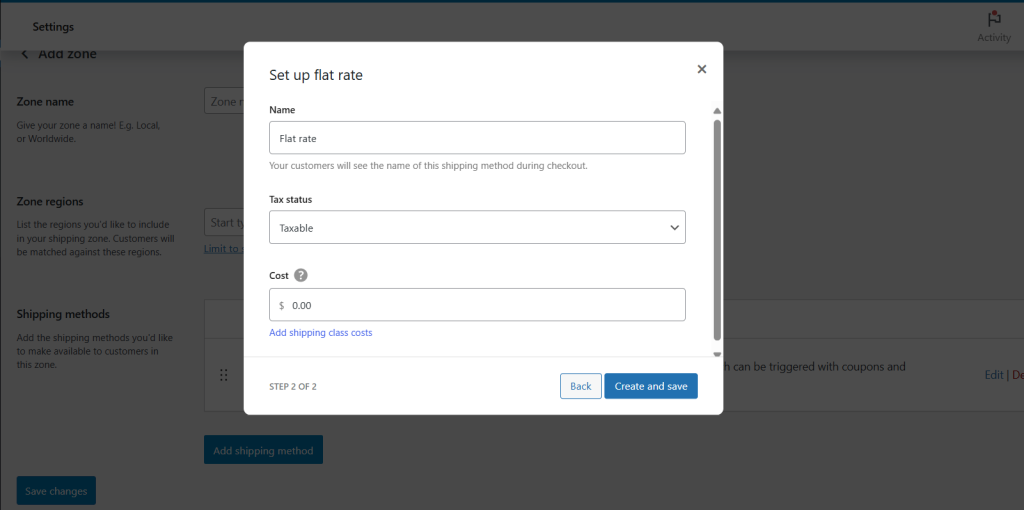
Set Up Shipping Methods
Add shipping methods depending on your business capabilities.
- Go to WooCommerce > Settings > Shipping.
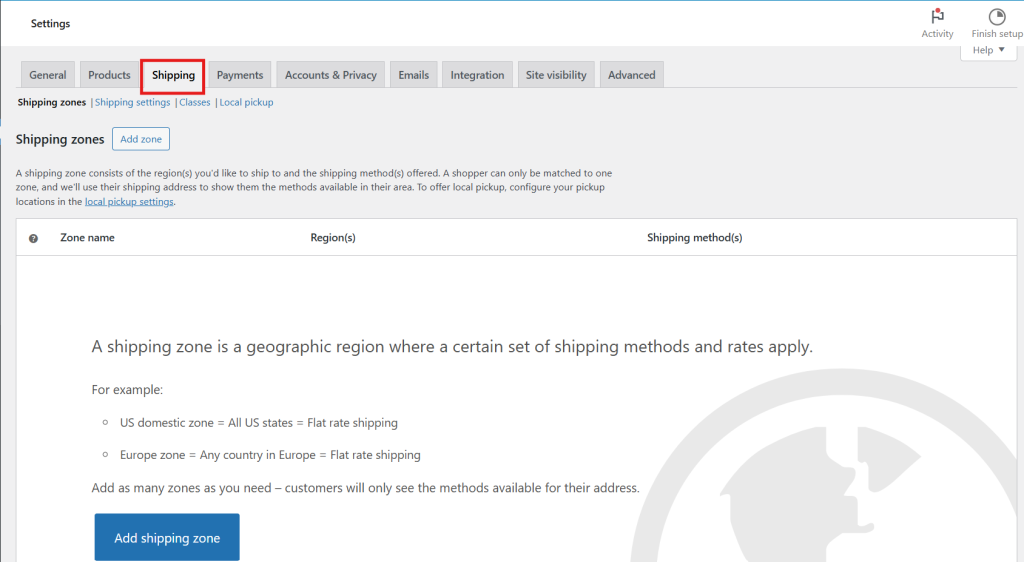
- Add shipping zones based on your customer locations.
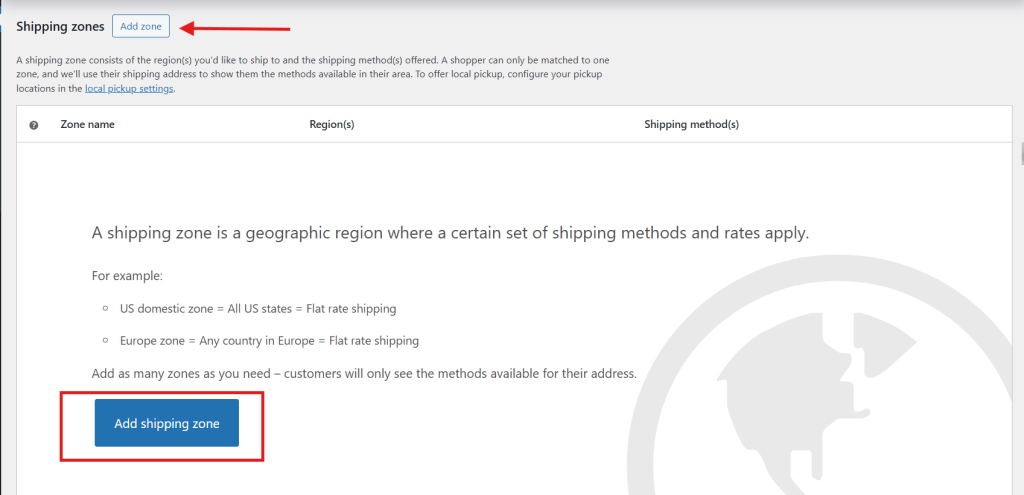
- Type Your Zone Name and select the region

- Add your capable shipping methods, define flat rate, free shipping, or local pickup options.
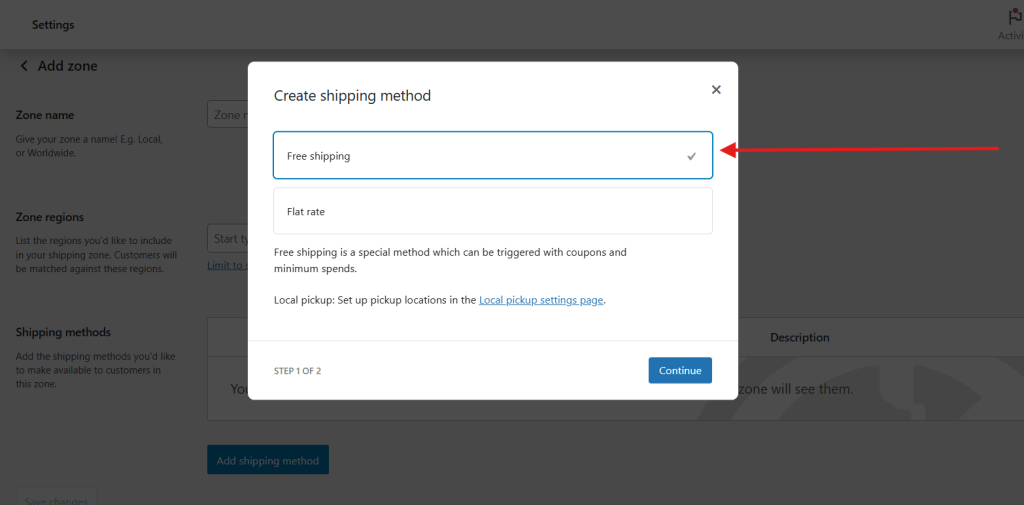
- Configure your tax status and cost if needed.
Configure Tax Settings
Set up the value of your business according to the VAT tax rules of your area, location, or country.
- Go to WooCommerce > Settings > Tax.
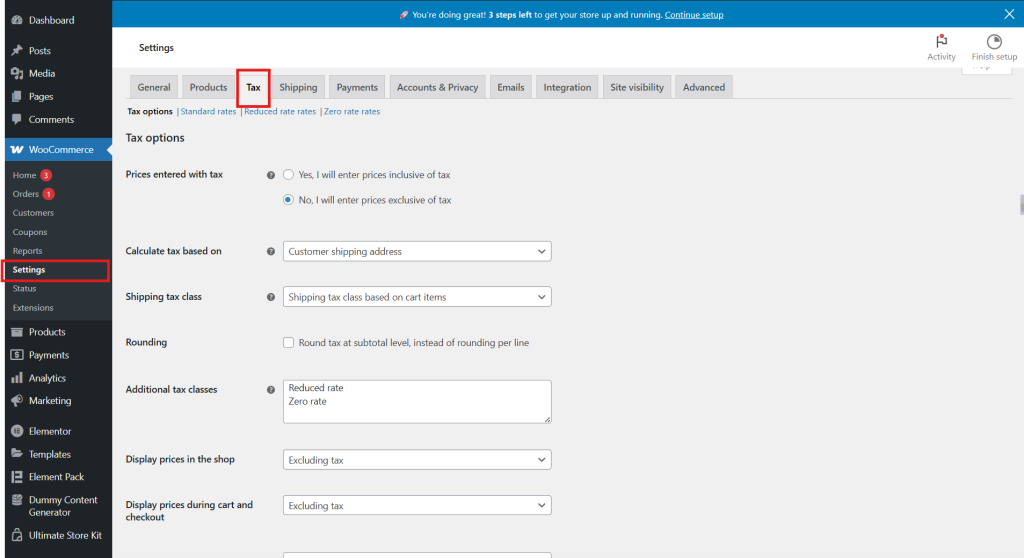
- Enable automated tax calculations (if supported in your region).
- Set tax rates based on country or state rules.
- Apply taxes to shipping and product pricing as needed.
Install Recommended Plugins
Since we want to create a customer-friendly and attractive WooCommerce store without coding, and we know that using Elementor makes it easy, we will still install some necessary tools for more better design and customization of our WooCommerce store.
It’s because, to design a WooCommerce Shop Page with Elementor, you have to face some limitations, such as feature limitations, a premium required, and unlimited design variants.
So, to use extra free features and WooCommerce templates, personally, I will recommend you use the freemium Ultimate Store Kit plugin. It removes Elementor’s limitations, giving you access to premium-level store design without the extra cost.
So, to do the entire process, you will just need to install 2 plugins:
- Elementor (Free or Pro)
- Ultimate Store Kit (Free or Pro)
Step 3: Add Products to Your Store
Now we’re at a crucial step—adding products to your WooCommerce store. This is where you create detailed listings and organize them using categories and attributes. Here’s how you do it:
Create and customize product listings
In this step, I will show you how to add your products.
- Navigate to WooCommerce > Products and click Add New.
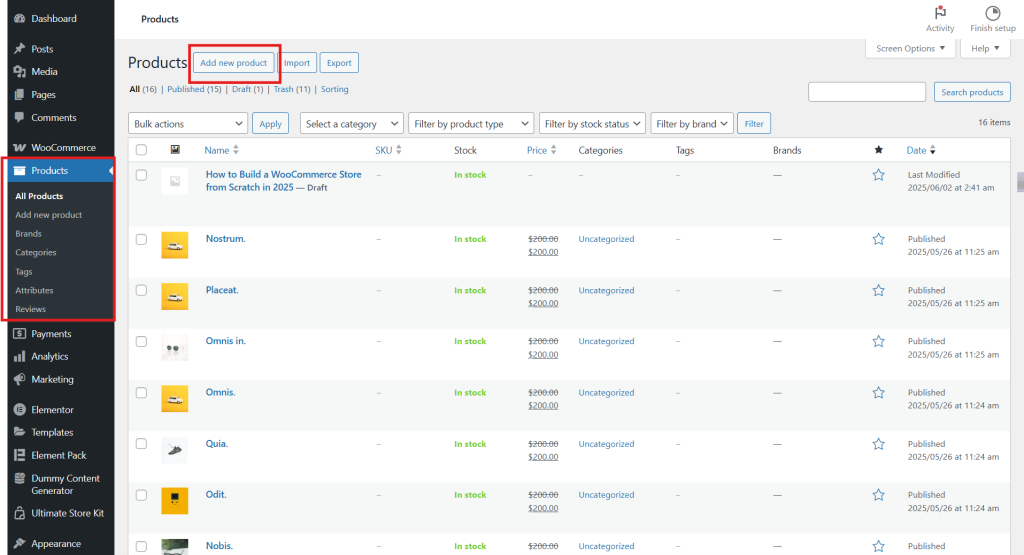
- Enter the Product Name and write a detailed description.
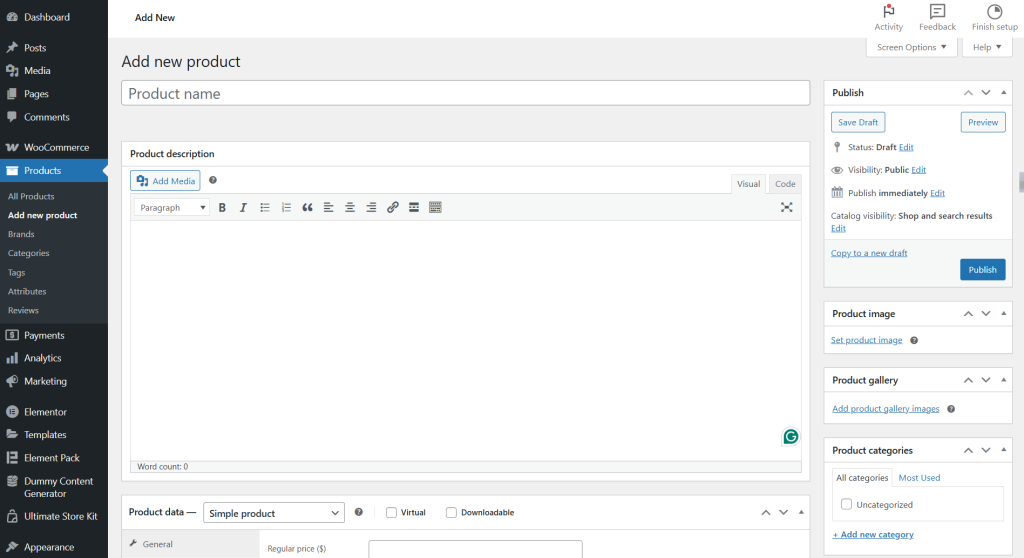
- In the Product Data section, choose a product type (Simple, Variable, Grouped, External).
- Set pricing details (Regular Price and Sale Price).

- Manage stock by enabling Inventory tracking if needed.
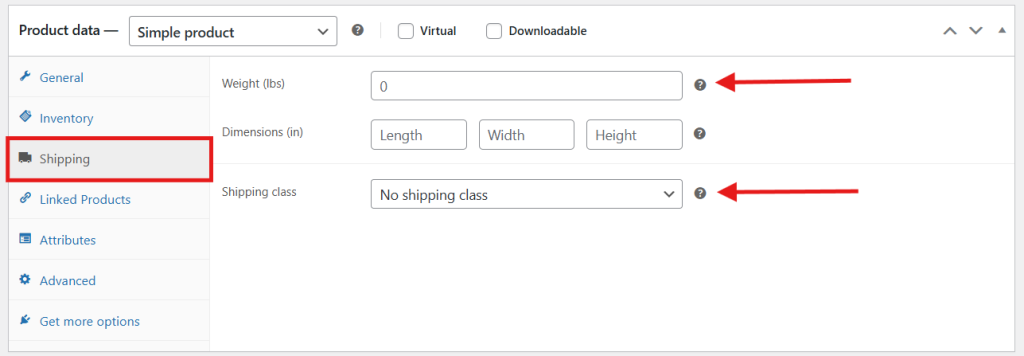
- Configure shipping details like weight, dimensions, and shipping class.
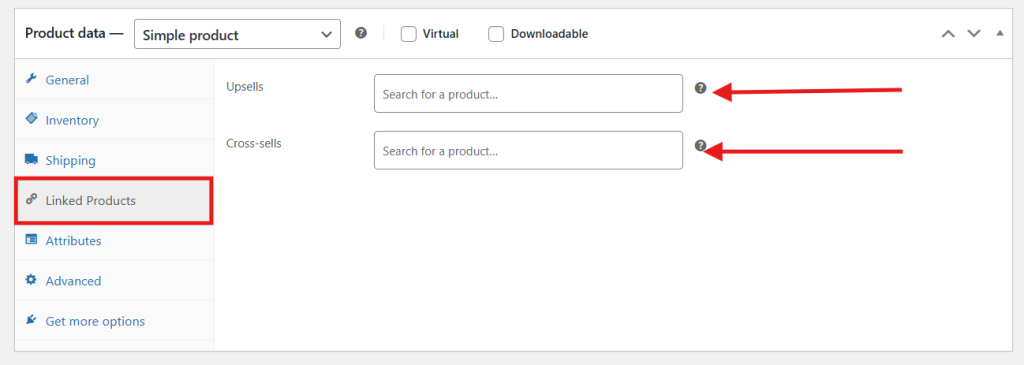
- Add linked products for recommendations (upsells and cross-sells).
Define Product Attributes
When adding each of your products, you will add all the product’s features or attributes, such as available variants, size, color, etc.`
- Navigate to Product Data > Attributes.
- Click Add and create attributes (e.g., Size, Color).
- For Variable Products, link attributes to variations (e.g., different sizes with unique prices).
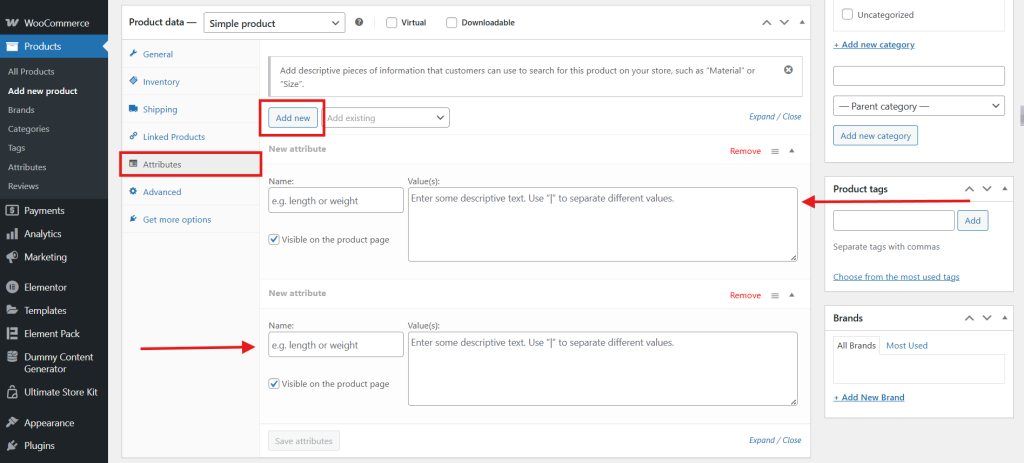
- Save attributes and ensure they’re applied correctly.
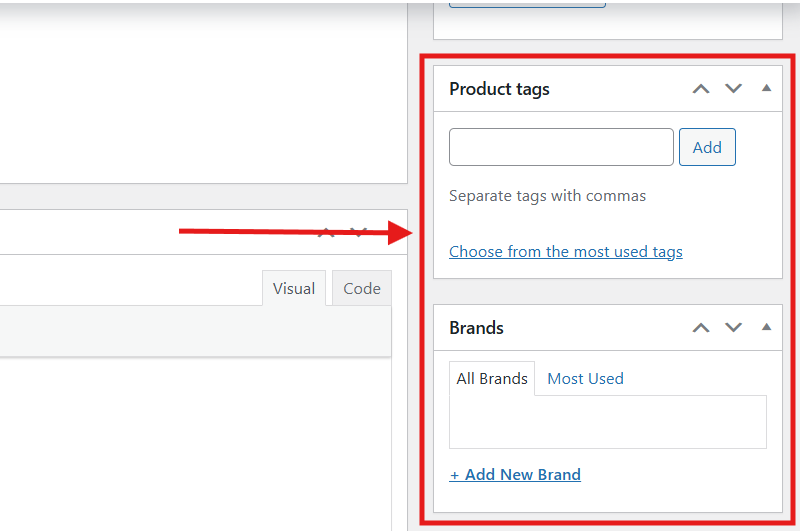
Add Product Categories and Tags
Now, you will include the products in categories and tags so that your customers can easily find the products they are looking for using the category filters and search filters.
- On the right sidebar, locate Product Categories.
- Click Add New Category or choose an existing one.
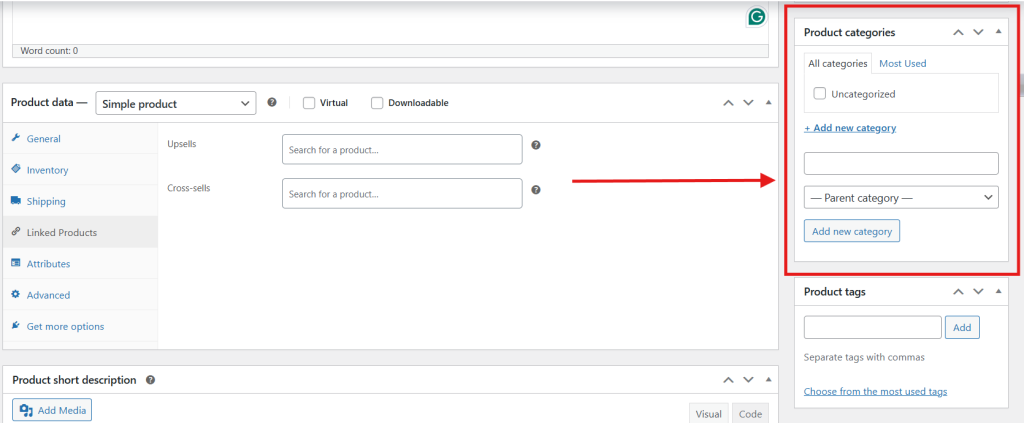
- Apply relevant Tags and Brands to enhance searchability.
Optimize Product Presentation
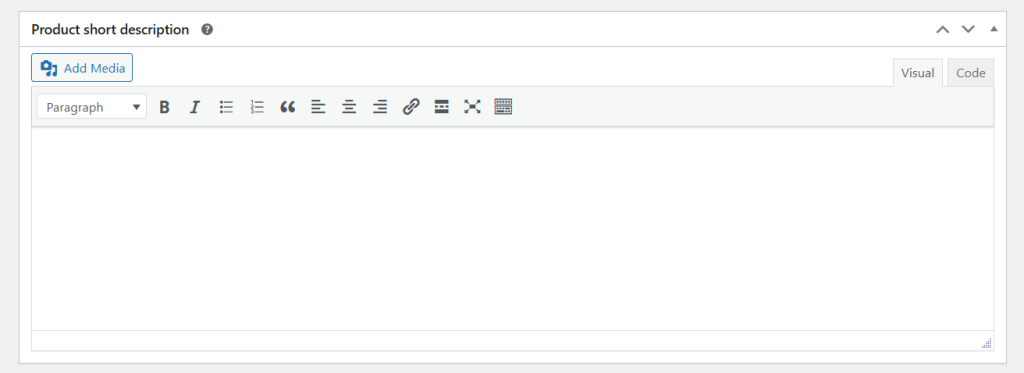
Be sure to have beautiful images for the presentation of the products, provide more than one image for each product, and use the image gallery for this. Also, provide a short description.
- Upload a Product Image and add additional Gallery Images.
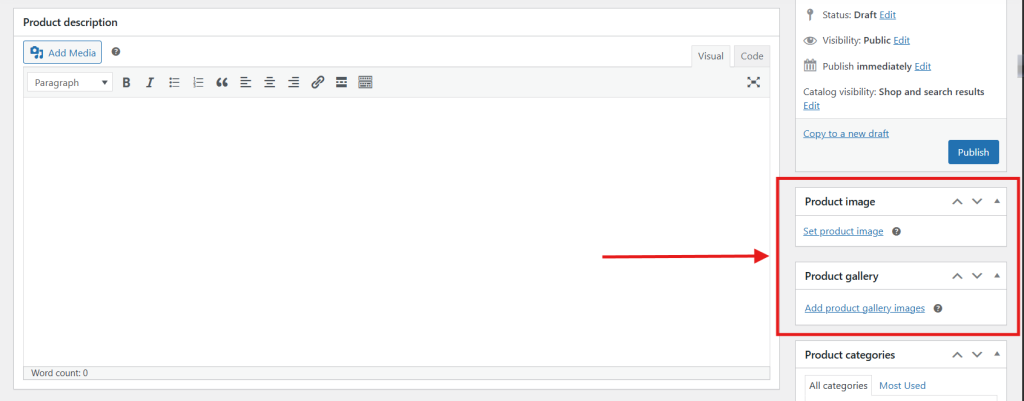
- Write a concise Short Description for quick customer insights.
Step 4: Design and Customize Your WooCommerce Store
When designing your WooCommerce store, it’s important to follow a structured process to ensure both functionality and design are well executed. Let’s go through the key steps together:
- WooCommerce Shop Page Design
- WooCommerce Product Page Design
- WooCommerce Cart Page Design
- WooCommerce Checkout Page Design
- Order Received Page Design
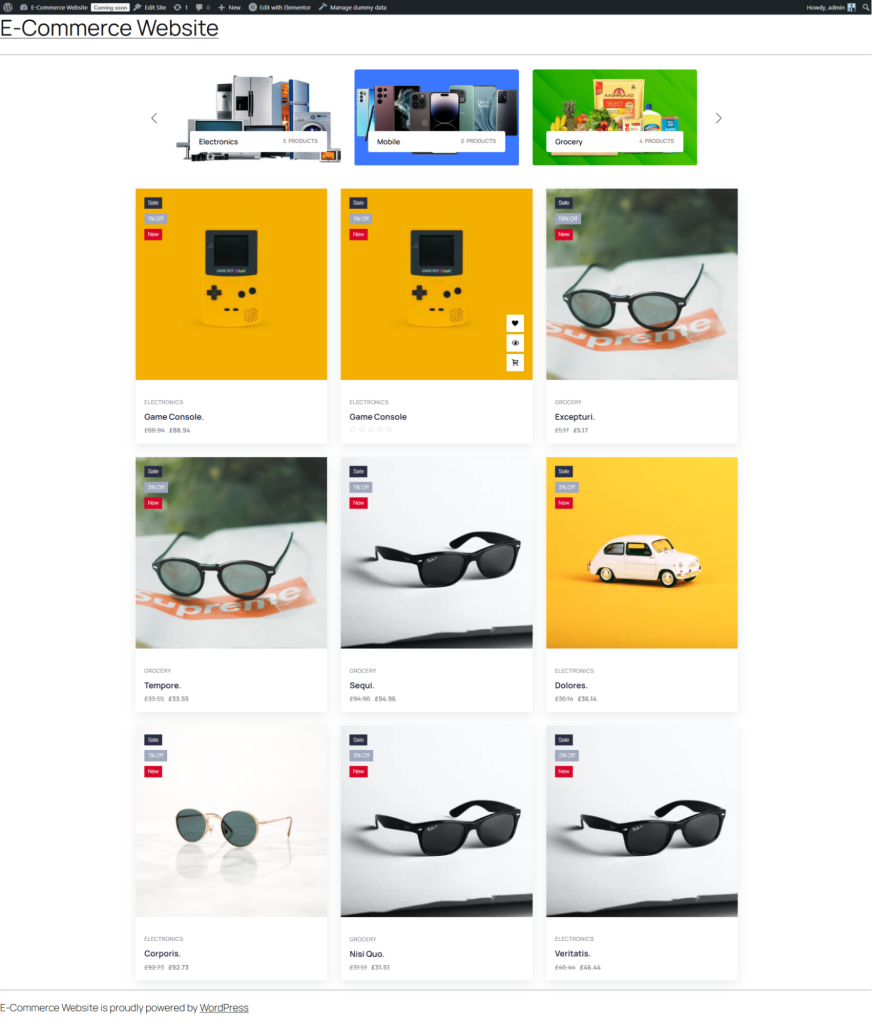
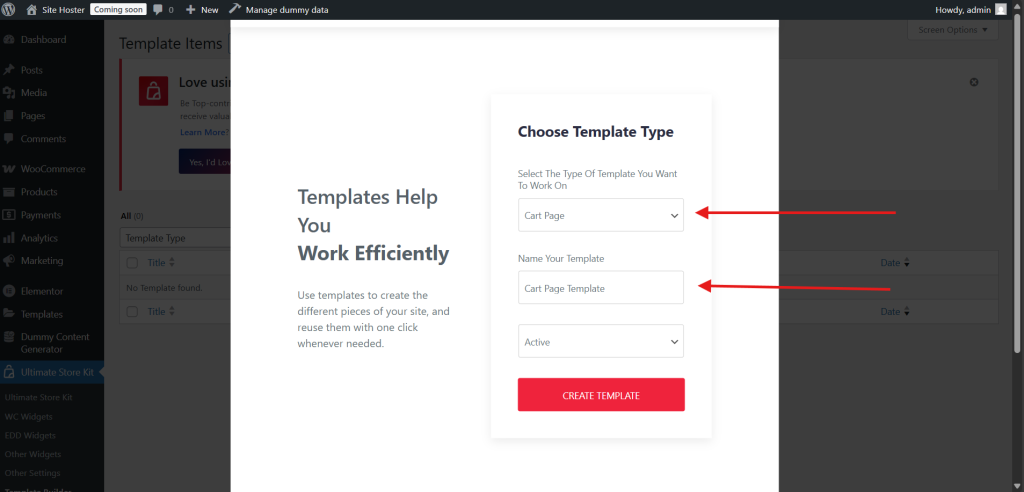
WooCommerce Shop Page Design
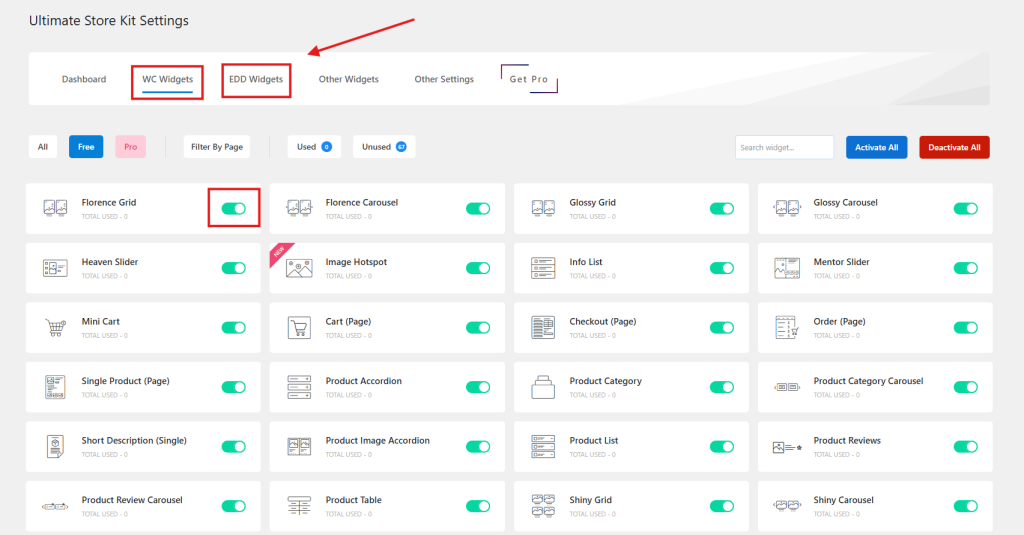
First of all, you need to set up an Ultimate Store Kit.
- Navigate to the Ultimate Store Kit dashboard.
- Access the WC Widget or EDD Widget tabs.
- Activate and manage widgets as per store requirements.
Now you will design the shop page.
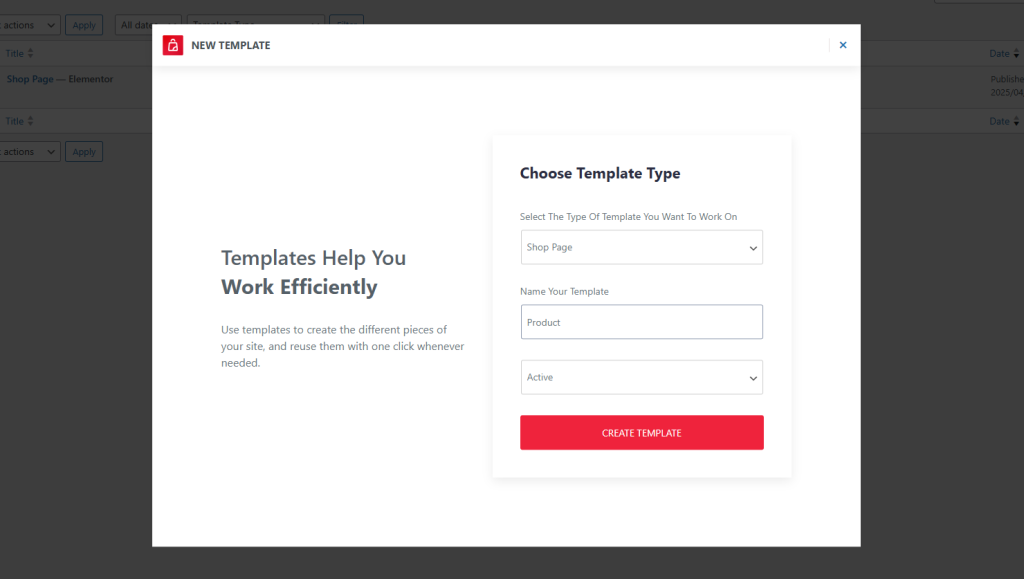
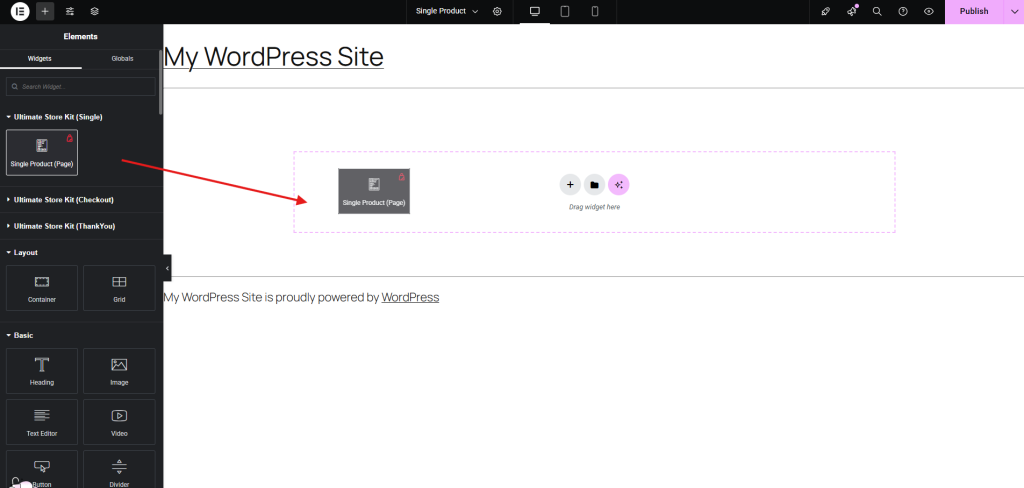
- Go to Ultimate Store Kit > Template Builder.
- Click Add New Template and choose Shop Page.
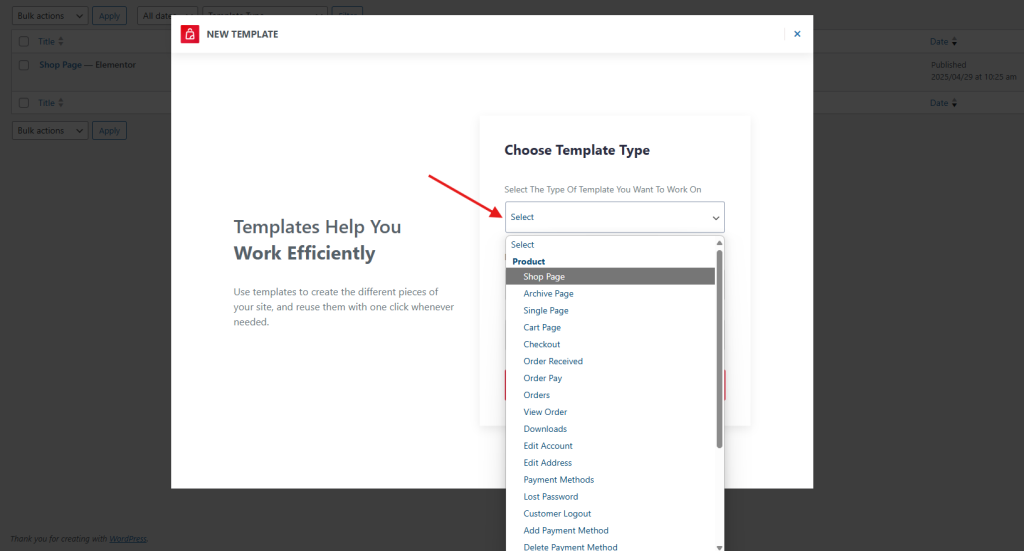
- Enter a name and set the template as Active, then click Create Template.
- The template opens in Elementor Editor.
- Drag and drop widgets from the Ultimate Store Kit sidebar.
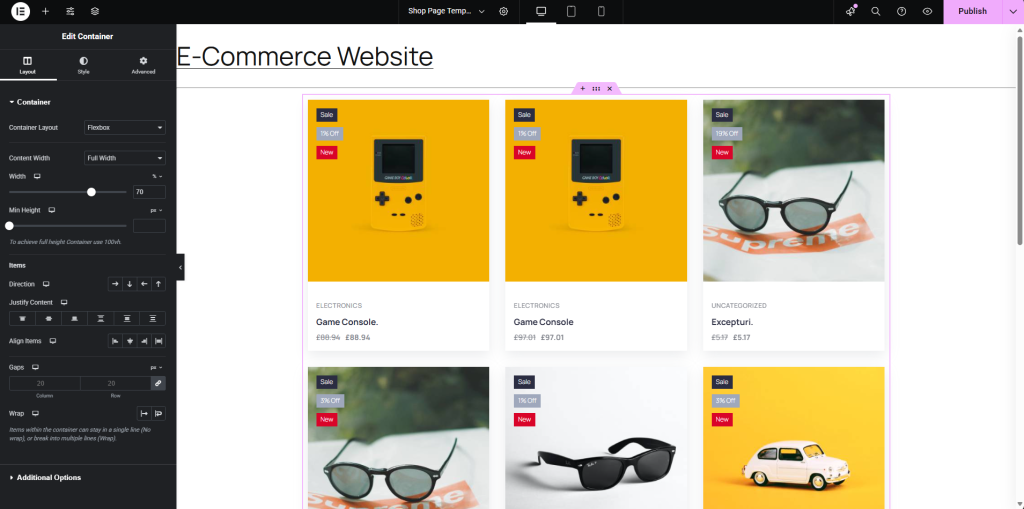
- I am using the Florence Grid as an example to structure my shop page.
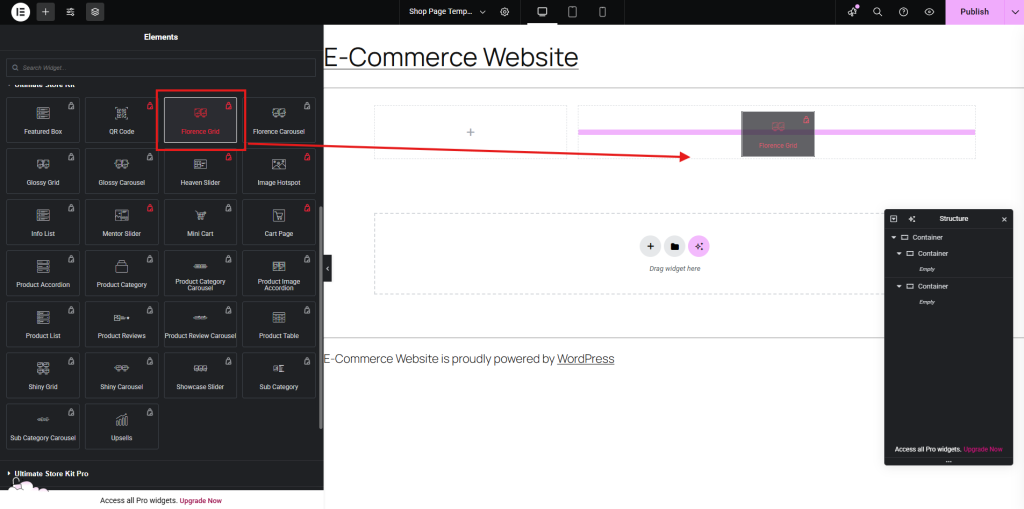
- Then, I will customize elements via the Edit Container sidebar.
- Finish, it’s time to publish and preview the shop page.
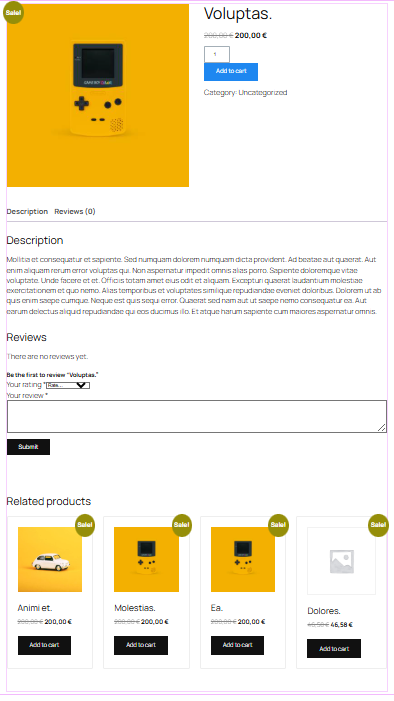
WooCommerce Product Page Design
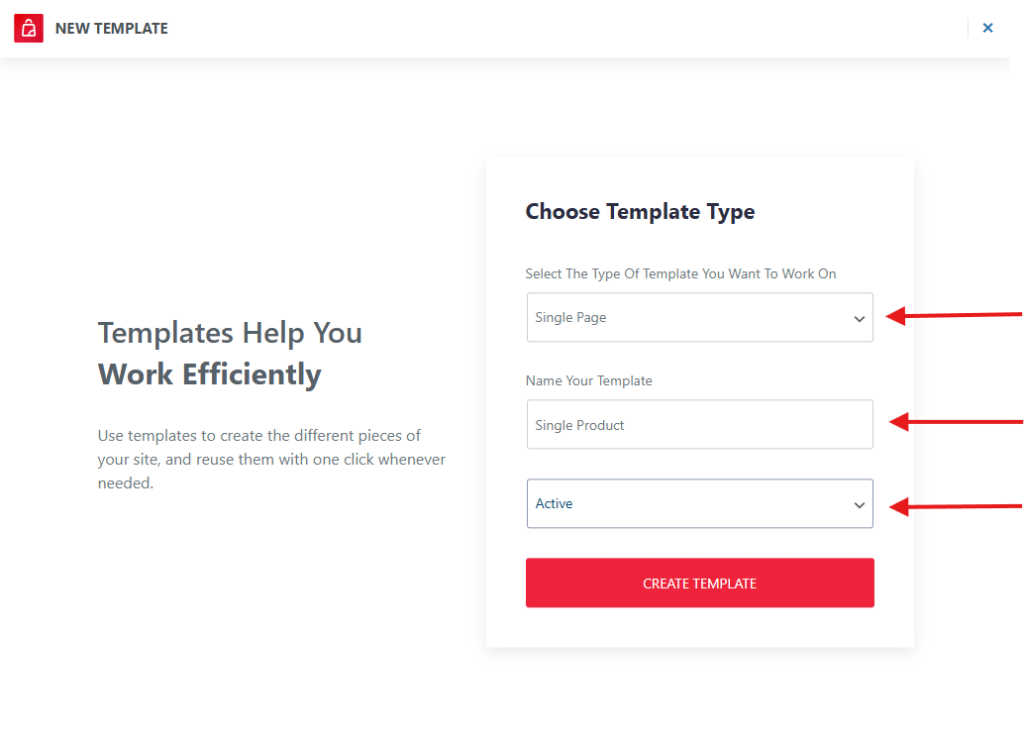
Since we are again using the Ultimate Store Kit template to design a product page, let’s first set up a template.
- Go to Ultimate Store Kit > Template Builder.
- Click Add New Template and select Single Page.
- Enter a name and click Create Template.
- Open the template in Elementor Editor and choose a layout.
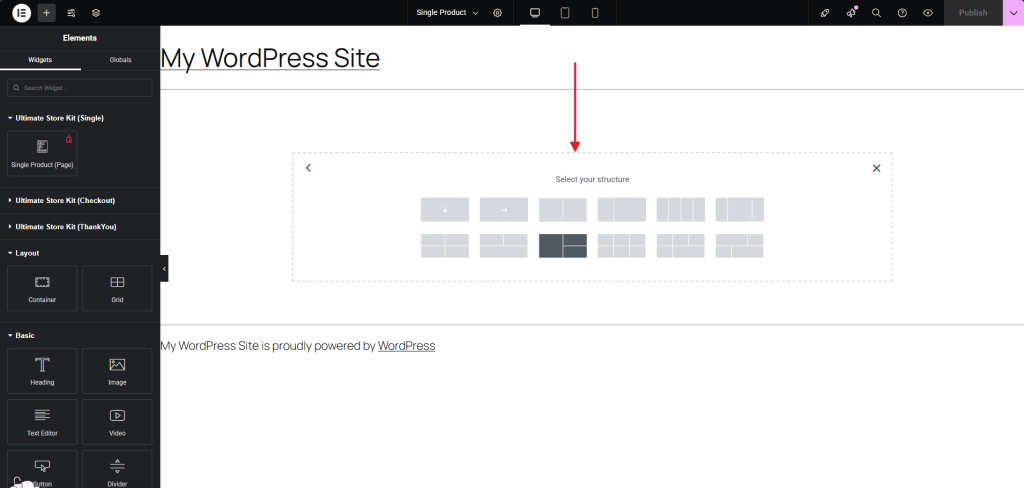
- Use built-in widgets or ready-made templates.
- Customize product elements (title, pricing, tabs, related products) using 80+ widgets.
- Adjust typography, colors, and layout for a professional finish.
Note:
For a detailed guide, check out our blog, How to Create a Single Product Page in WooCommerce. It’s filled with expert insights, step-by-step instructions, and pro tips to help you design the perfect WooCommerce product page.
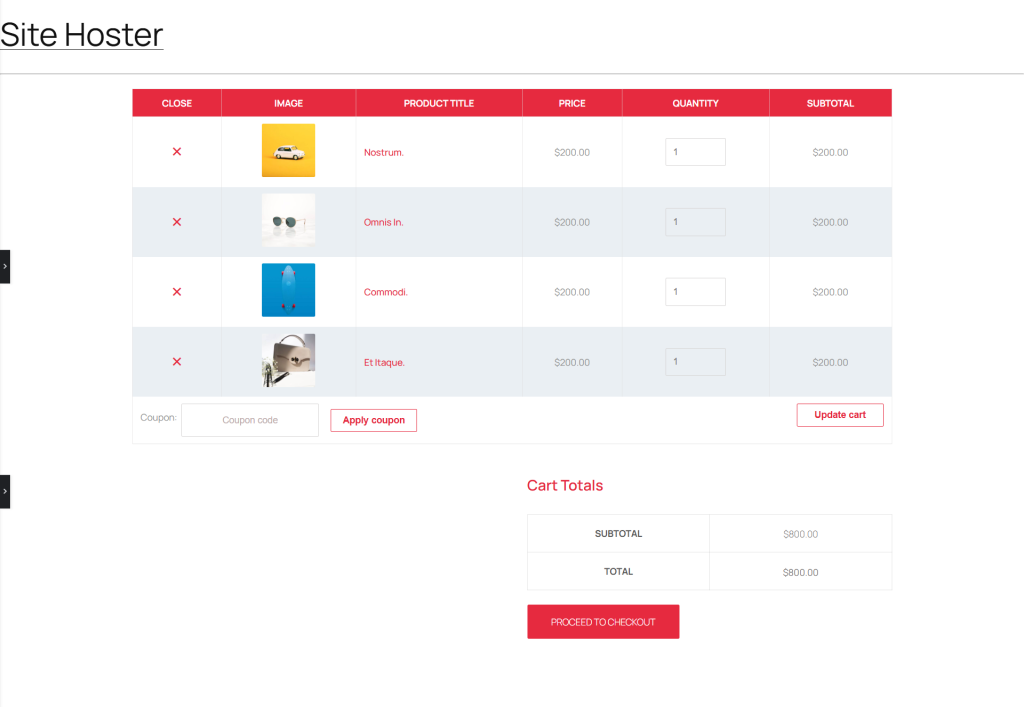
WooCommerce Cart Page Design
In this step, we will create a cart page,
- Navigate to Ultimate Store Kit > Template Builder.
- Click Add New Template, then choose Cart Page.
- Enter a name, set it as Active, and create the template.
- Open the template in Elementor Editor.
- Locate the Ultimate Store Kit section and find the Cart Page widget.
- Drag the widget to the main editing area.
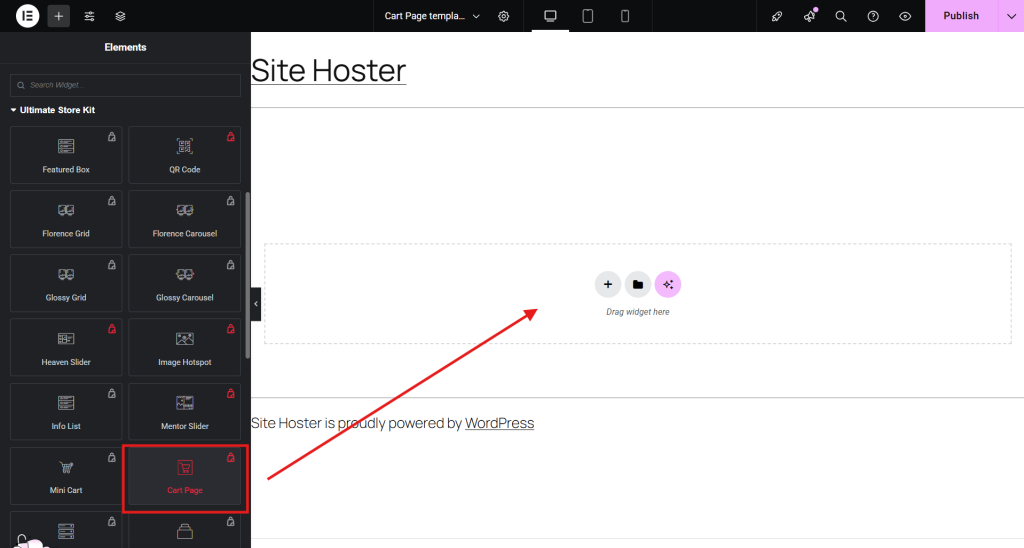
- Customize styling, layout, and display settings.
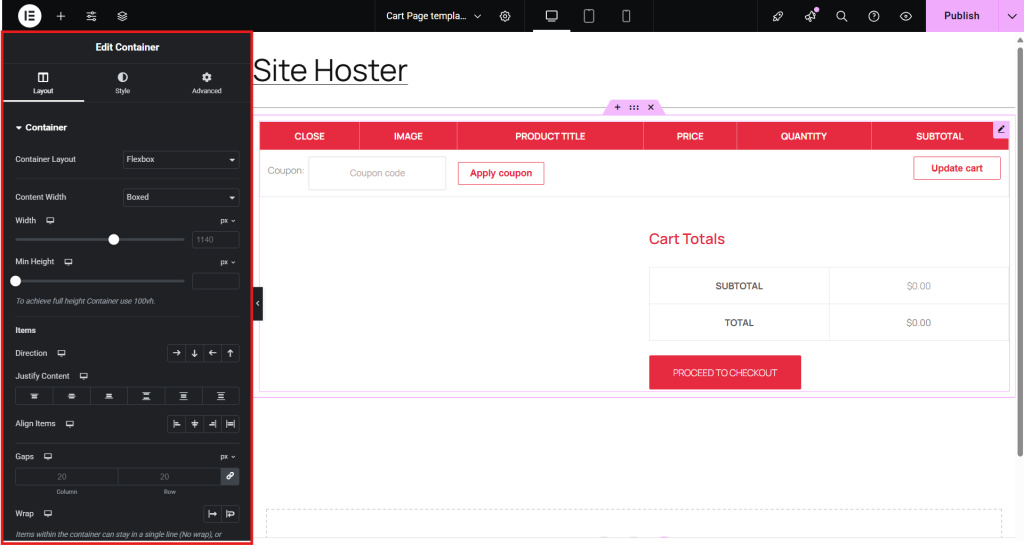
- Click Publish to apply changes.
- The cart page is now updated with the Ultimate Store Kit’s enhanced cart functionality.
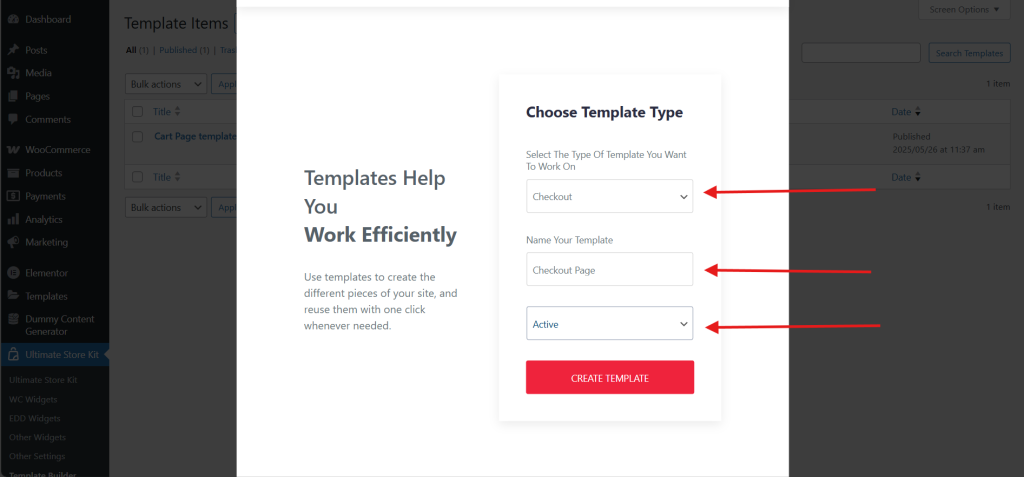
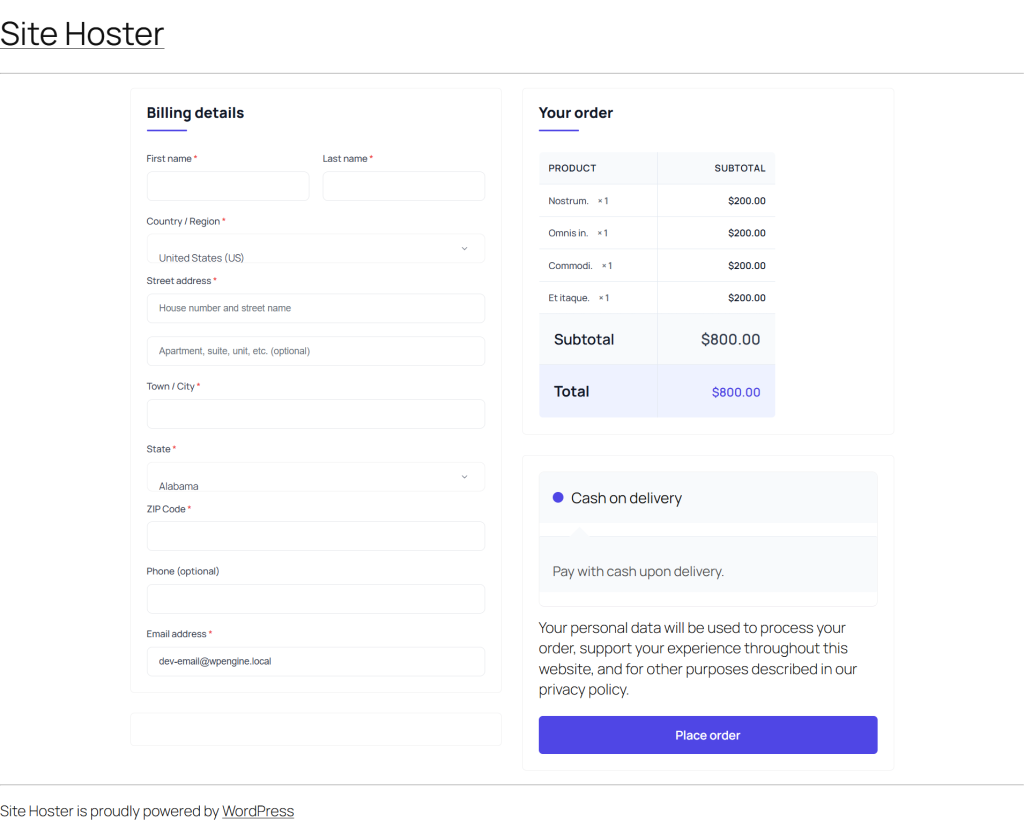
WooCommerce Checkout Page Design
This step in designing the WooCommerce Checkout Page. As before, to create a checkout page, you need to create a template.
- Go to Ultimate Store Kit > Template Builder.
- Click Add New Template and select Checkout Page.
- Name the template, mark it as Active, and create it.
- Open the template in Elementor Editor.
- Locate the Checkout Page widget in the sidebar.
- Drag the widget into the desired section.
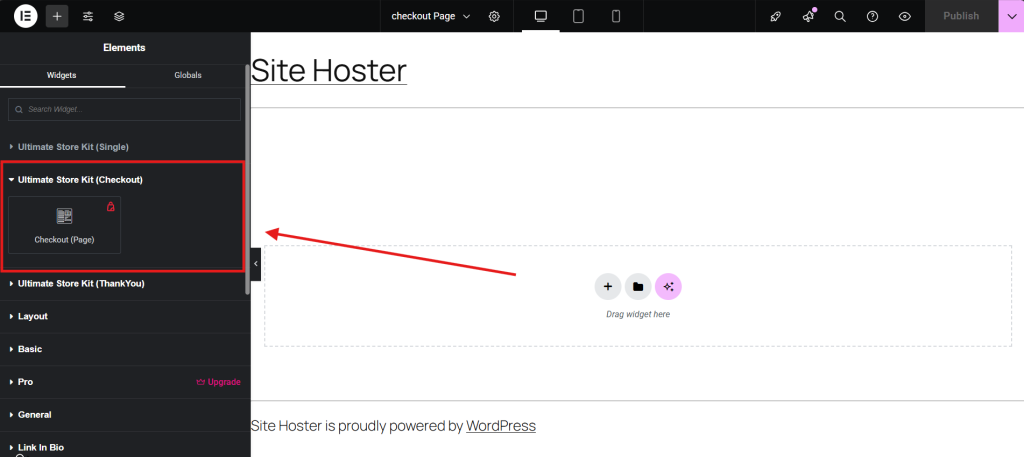
- Customize field arrangement, button styling, and responsiveness.
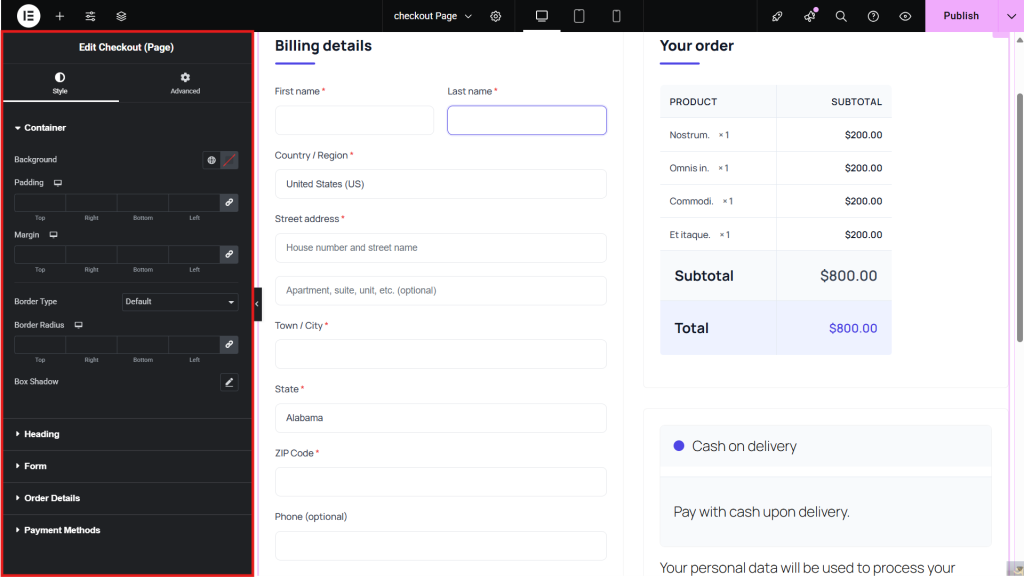
- Enhance the checkout experience with express buttons and payment gateway adjustments.
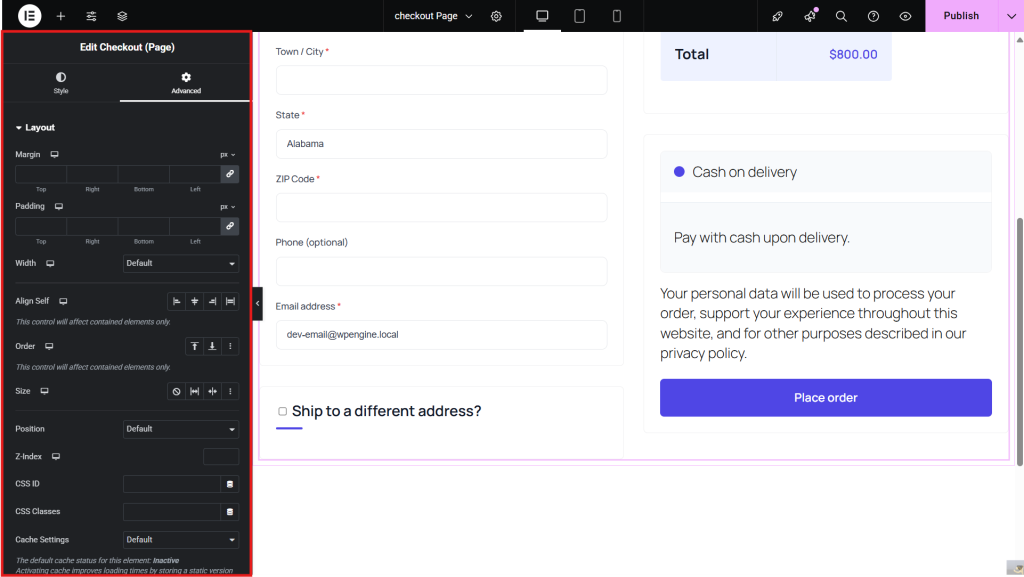
- Click Publish to finalize the page.
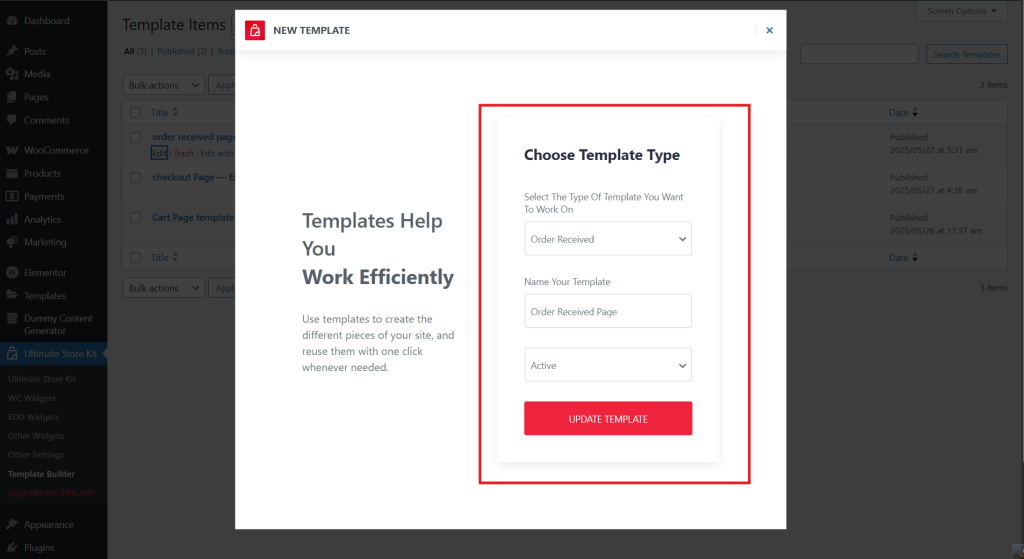
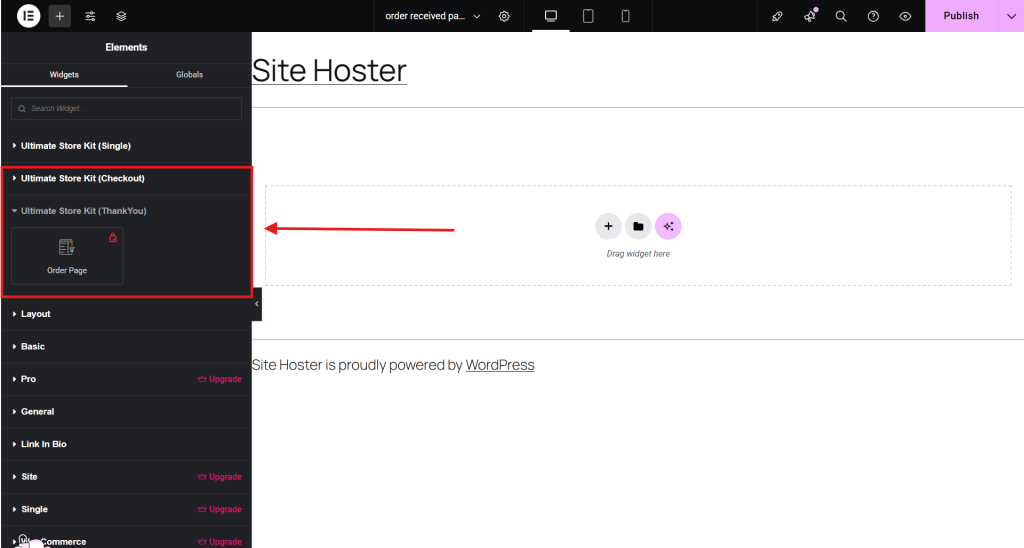
Order Received Page Design
Now, to design the Order Received Page, you need to create a template.
- Go to Ultimate Store Kit > Template Builder.
- Click Add New Template and select Order Receive Page.
- Name the template, mark it as Active, and create it.
- The template will be open in Elementor Editor.
- Locate the Order Receive widget in the sidebar.
- Drag the widget into the designated section.
- Adjust field arrangement, button styling, and responsiveness.
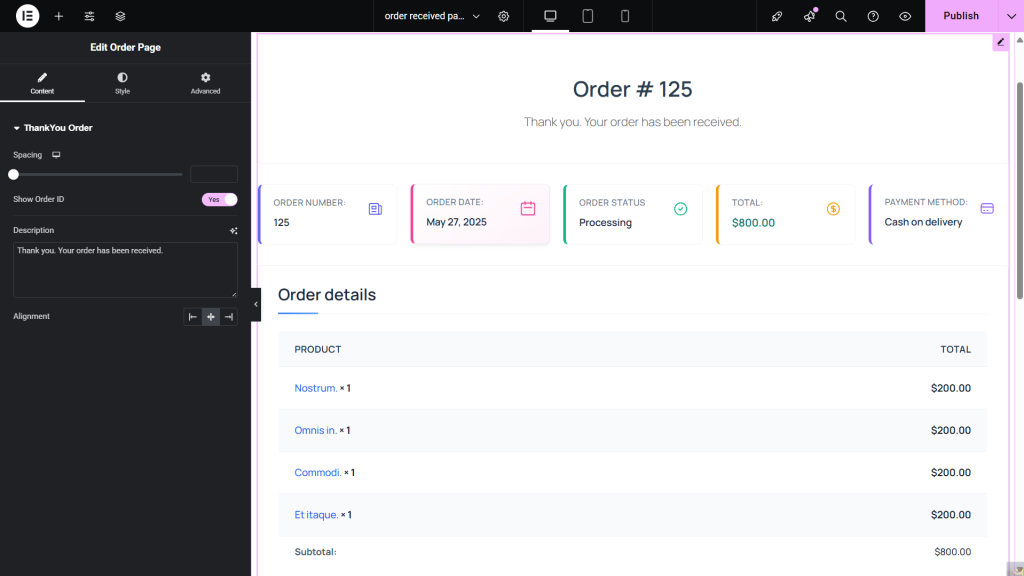
- Modify checkout display options to enhance the user experience.
- Click Publish to save the changes.
We have finally built a complete eCommerce store!
For more in-depth guidance, check out my other blogs on
FAQ
How long does it take to build a WooCommerce store?
The truth is that it depends. The process can take anywhere from 1 week to even 1 year. This is not specific, it depends on your eCommerce business. If your products are many, the functionality and design of the pages are more optimized and advanced, then it will take more time to create them.
Is WooCommerce easy to set up?
Yes, especially for WordPress users. The setup wizard simplifies the process, though advanced features require extra customization.
How long does it take to build a 100-page website?
It depends on complexity—simple sites take weeks, while detailed eCommerce or content-heavy sites may take months.
Is WooCommerce more expensive than Shopify?
WooCommerce is free but involves hosting and plugin costs. Shopify has fixed pricing but limits customization. The total cost depends on your needs. However, many people are now migrating from Shopify to WooCommerce.
How do I speed up my WooCommerce store?
Optimize WooCommerce to improve your loading speed, optimize images, use caching plugins, limit unnecessary plugins, enable a CDN, and choose a high-performance hosting provider.
Conclusion
In this blog, we’ve walked you through the process of building a WooCommerce store from the ground up.
From installation and shop page setup to order receive page layouts, we’ve outlined essential steps to help you create a store that fits your vision. With the right approach, you can build a functional and well-structured e-commerce site.
We hope this guide has offered useful insights and clear steps to help you set up your WooCommerce store with confidence.
Please do not hesitate to leave any questions or comments in the space provided below. Wishing you all the best!
If this article resonated with you, remember to subscribe to our newsletter for more captivating articles, updates, and special offers sent straight to your inbox. Furthermore, follow us on Facebook, X, and YouTube to keep yourself informed.