

WooCommerce is a great choice for starting your eCommerce journey. It automatically sets up all the essential pages, so you can focus on adding products, setting up payments, and shipping.
However, the default WooCommerce pages aren’t fully optimized, which might affect your sales. To get the best results, you’ll need to tweak them.
The challenge? WooCommerce doesn’t offer many built-in customization options. So, what’s the solution?
There are many ways to customize WooCommerce, but some methods can be complex and time-consuming, especially for beginners or non-technical users.
That’s why, in this blog, we’ll walk you through an easy yet advanced approach to creating a fully customized single product page in WooCommerce—no complicated steps, just a straightforward process.
Methods to create a WooCommerce single product page
- Using Page Builders (Ultimate Store Kit): The easiest way to customize your WooCommerce single product page! With drag-and-drop functionality, you can design your page without coding, making it perfect for beginners and non-technical users.
- Customizing the WooCommerce Default Template: Requires manual adjustments, which can be tricky if you’re unfamiliar with WooCommerce’s structure. While it offers some flexibility, it’s not the most efficient option for major changes.
- Using Shortcodes: A simpler way to add WooCommerce elements, but it has limitations. You’ll need to experiment with shortcode placement to get the right layout.
- Using a Custom PHP Template: A powerful method, but only for developers comfortable with coding. While this approach allows full control, it’s time-consuming and not beginner-friendly.
- Using WooCommerce Hooks & Filters: Best for advanced users who want deep customization. If you’re not experienced with coding, this method can be complex and may require extra troubleshooting.
- Manual CSS Styling: Helps refine design elements, but it doesn’t allow structural changes. While useful for minor tweaks, it won’t give you a fully optimized layout.
In this blog, we use Page Builders – Ultimate Store Kit Addons Plugin for WooCommerce.
Why?
Because it’s the easiest and most effective method! With drag-and-drop functionality, you can fully customize your WooCommerce single product page without coding. This approach is beginner-friendly, saves time, and ensures your store looks professional while optimizing for conversions.
Other methods require technical knowledge or more effort, but Page Builders give you control without complexity.
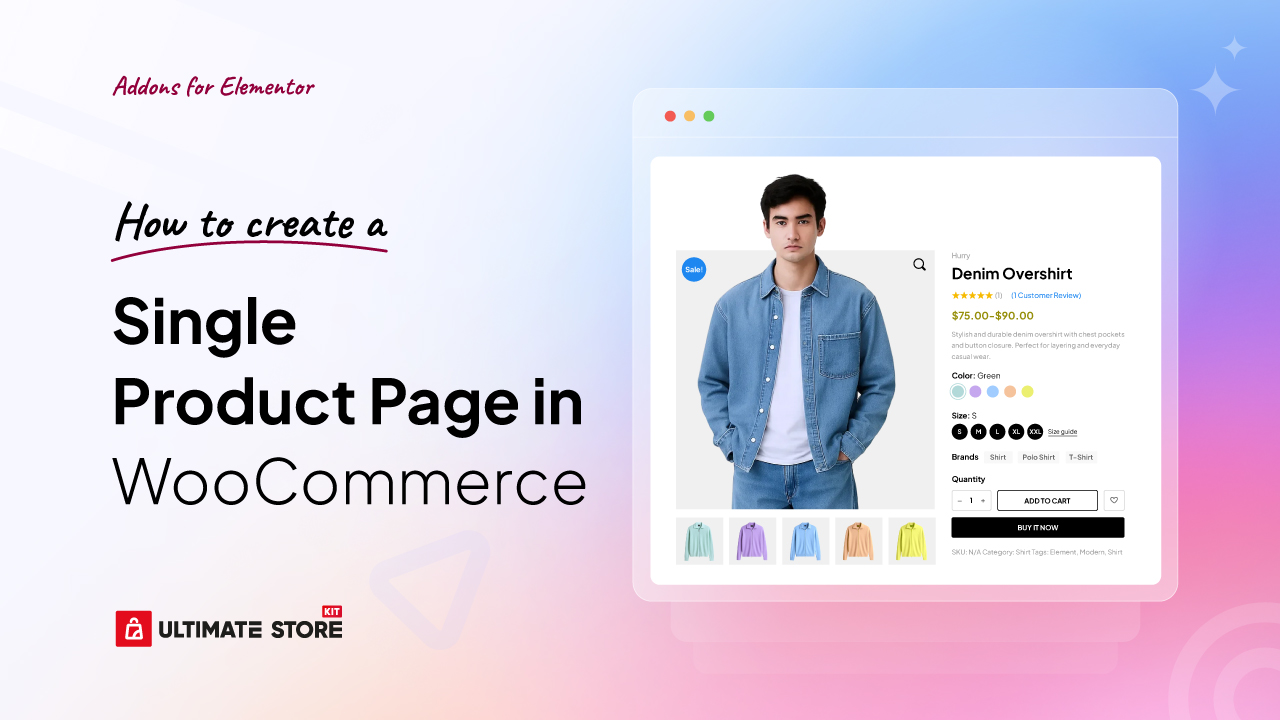
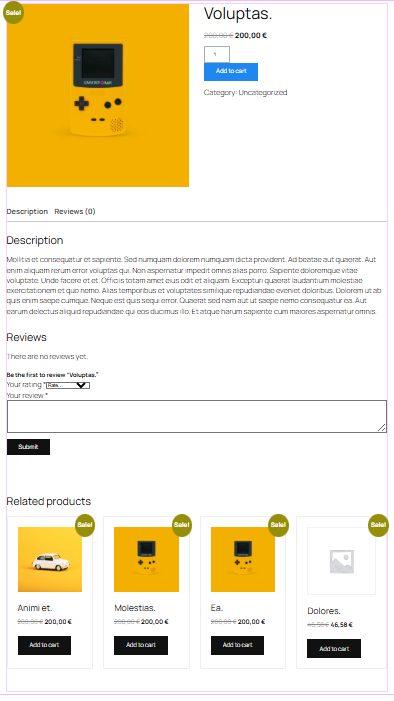
Preview of a Single Product Page in WooCommerce
We will use the page-building method to construct a single product page, achieving the style shown in the product page image below. Each element will be arranged thoughtfully for a smooth and engaging experience.
Steps to Build a Single Product Page in WooCommerce
- Step 1: Create a WooCommerce Single Product Page Template
- Step 2: Customize Your Product Page Template Layout
- Step 3: Design WooCommerce Single Product Page Template
Before we start the main steps to create a WooCommerce single product page using the WooCommerce Page Builders method, we need to install a few essential tools.
Essential Tools for Creating WooCommerce Single Product Page
To design and customize a WooCommerce single product page efficiently, the best tools to use are:
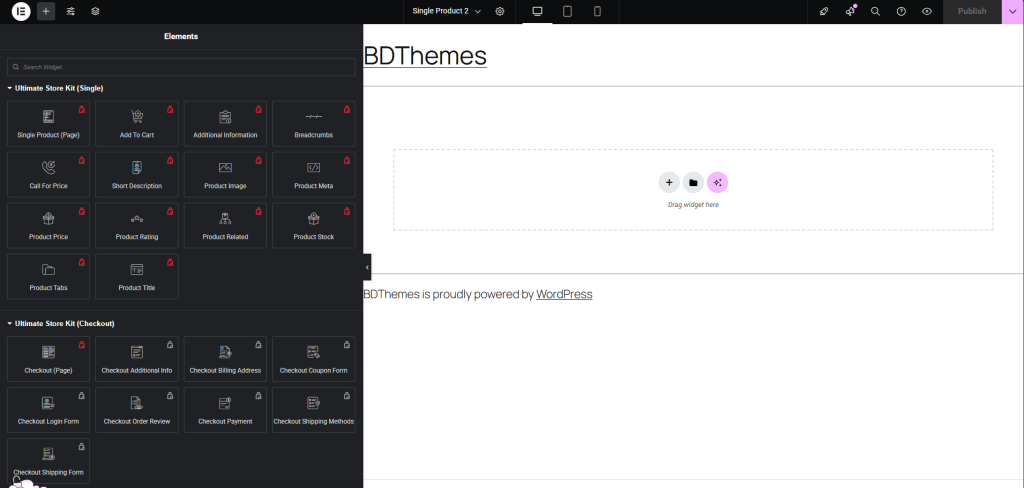
Elementor: A powerful page builder with drag-and-drop functionality, making it easy to design and customize product pages without coding.
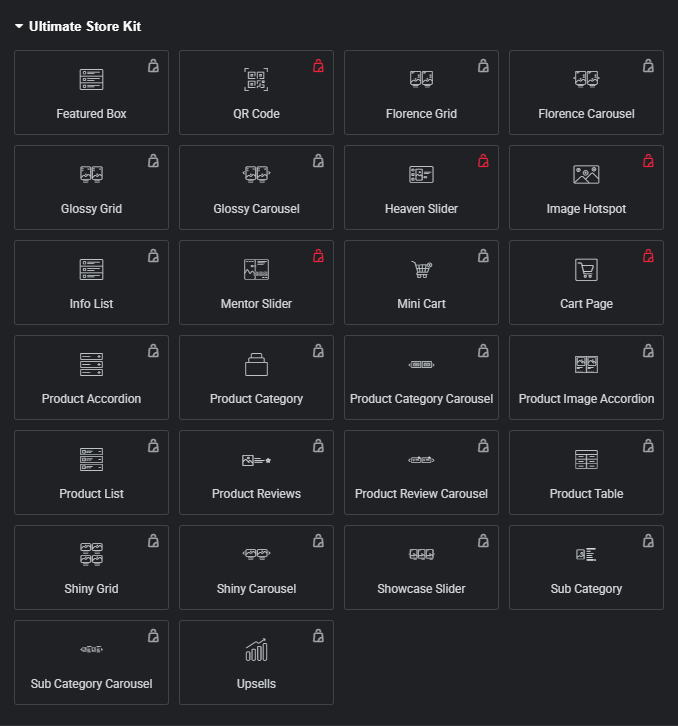
Ultimate Store Kit: A complete toolkit for WooCommerce, packed with 80 widgets and eCommerce tools to refine the layout and improve the usability of your product pages.
So if you haven’t installed it, install it now and get started.
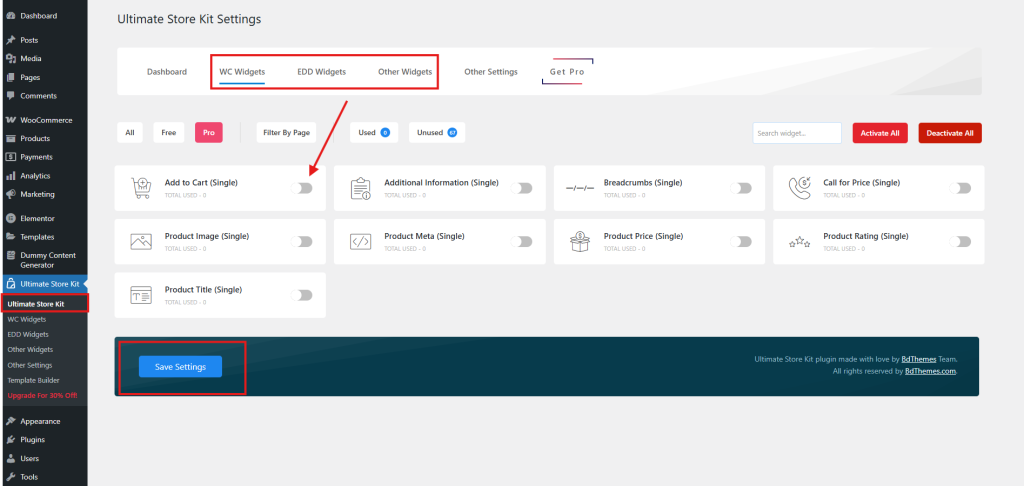
Important Setup Step: Before starting the design, ensure the widgets you plan to use are enabled:
- Go to Ultimate Store Kit >> WC Widgets, EDD Widgets, and Other Widgets
- Toggle on the necessary widgets
- Click Save Settings
Now, you’re ready to start building and designing a fully customized WooCommerce product page.
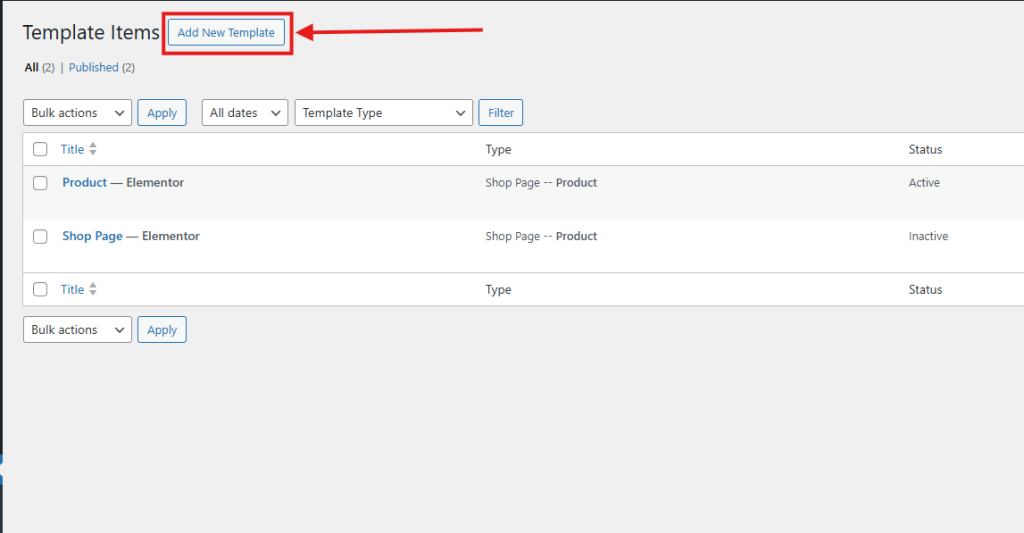
Step 1: Create a WooCommerce Single Product Page Template
To create a custom WooCommerce single product page template using Ultimate Store Kit, follow these steps:
- Open Ultimate Store Kit
- In your WordPress dashboard, navigate to Ultimate Store Kit > Template Builder.
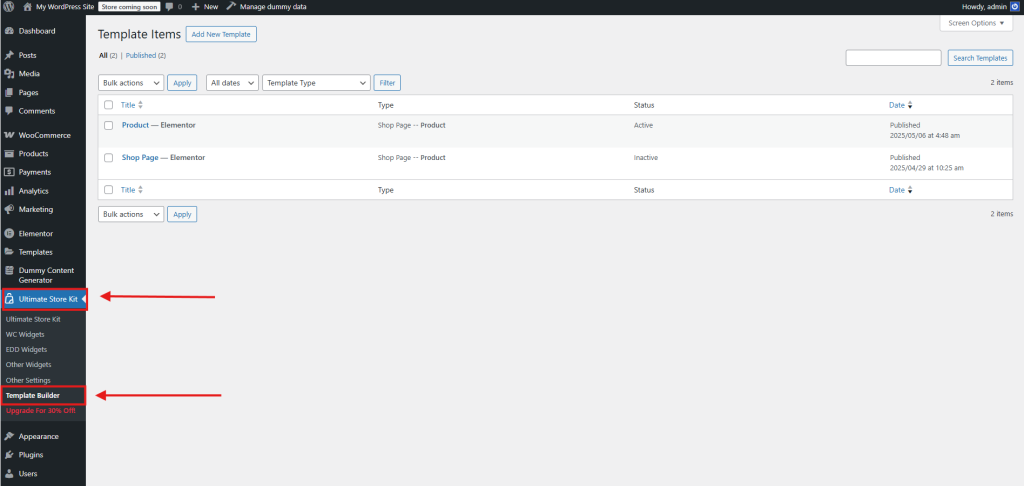
- Click on Add New to start creating a new template.
- Set Up the Template
- Choose Type: Single Page for a single product page.
- Enter a name for the template to keep it organized.
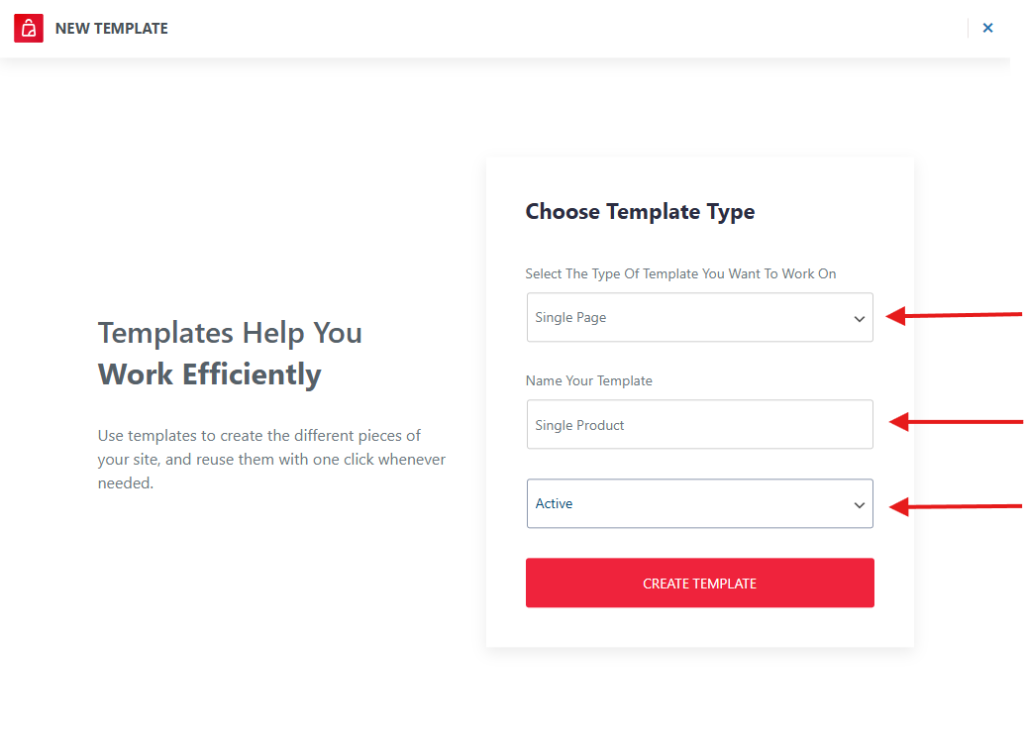
- Click Create Template to finalize the setup.
Step 2: Customize Your Product Page Template Layout
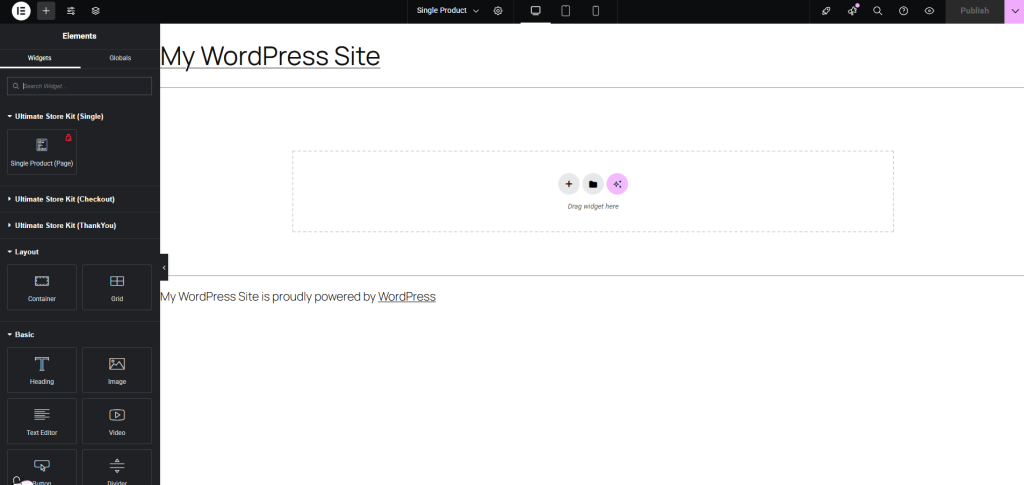
Once the template is created, it will automatically open in the Elementor Editor for customization.
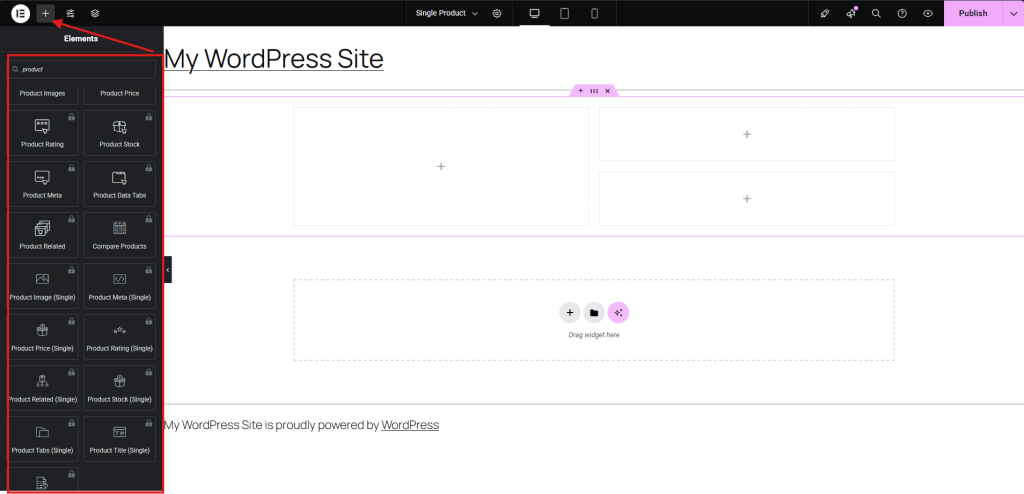
- Select a layout structure in Elementor to adjust the design of your WooCommerce single product page. Choose a format that best fits your store’s style and product presentation, then start customizing to create a unique and engaging product page.
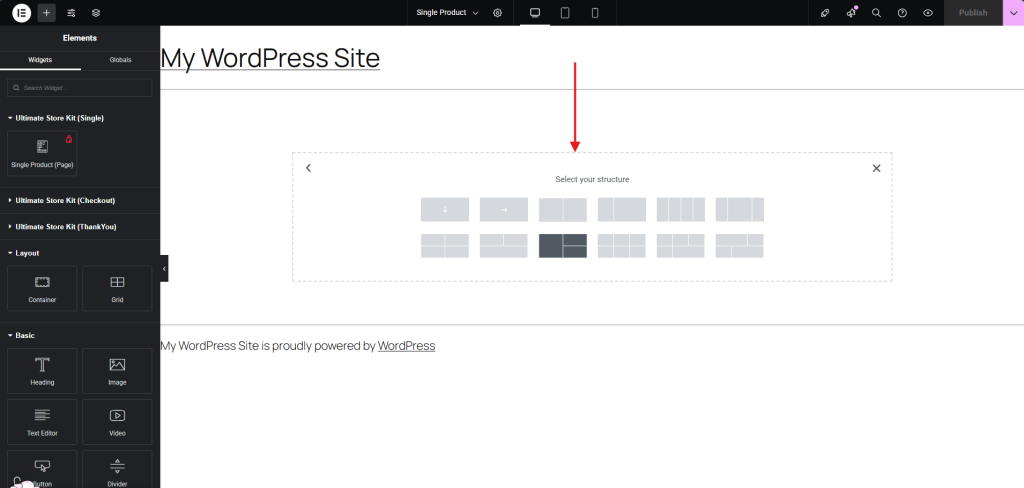
- Now that you’ve selected a layout structure, it’s time to add widgets to your WooCommerce single product page.
- You can also use the Store Kit’s Single Product (Page) widget as a structure for a full single product page without creating a custom structure and customize it as needed. It is a ready-made single page provided by the Ultimate Store Kit, which allows you to tweak and customize the entire layout to match your vision.
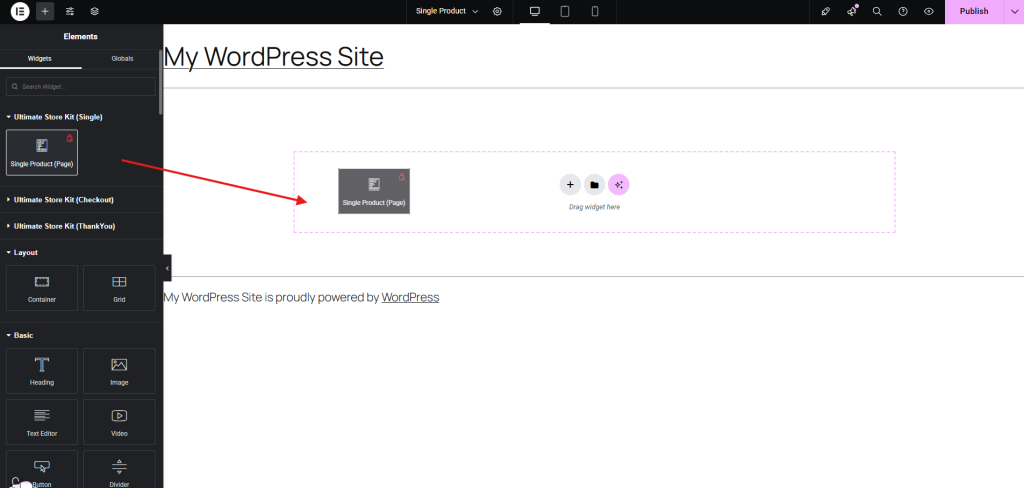
- This is how it will look by default, a ready-made single page, but you can customize each element and layout as you like.
Step 3: Design WooCommerce Single Product Page Template
Now it’s time to design and style your product page using Ultimate Store Kit widgets. Here’s how to easily design for a better shopping experience:
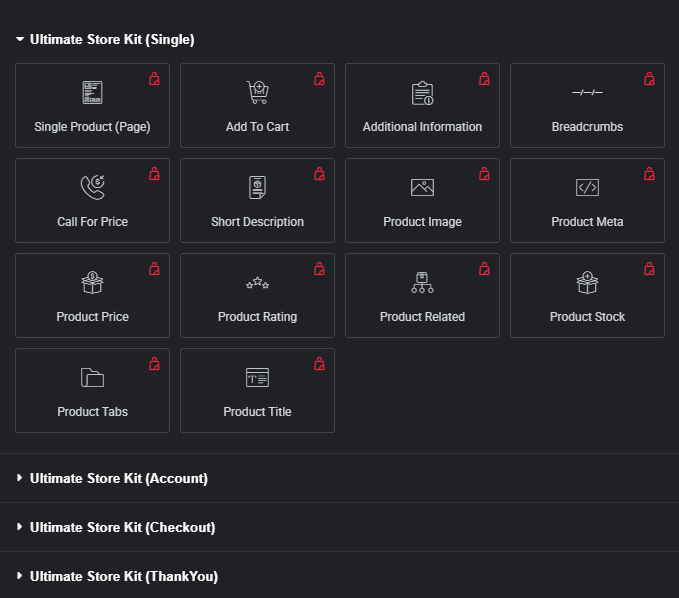
- Widgets for a single product page design
After selecting a layout, if you prefer not to use the ready-made single page from Ultimate Store Kit, you have complete freedom to arrange widgets in any order, crafting your WooCommerce single product page exactly as you envision.
With over 80 powerful widgets at your disposal—including product images, titles, pricing, stock status, product tabs, and more—you gain total creative control to build a fully customized, high-converting product page.
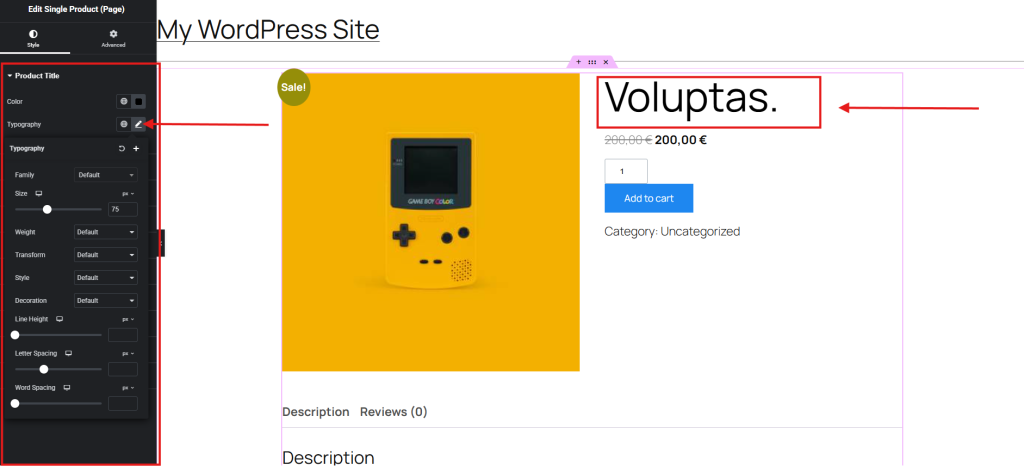
- Customizing WooCommerce Product Title
Customizing the WooCommerce product title is a straightforward yet impactful way to enhance your store’s visual appeal and branding.
In the product title option, you will get a variety of typography settings at your disposal. You can refine the title’s color, font family, size, weight, style, and spacing to create a unique look that complements your store’s design.
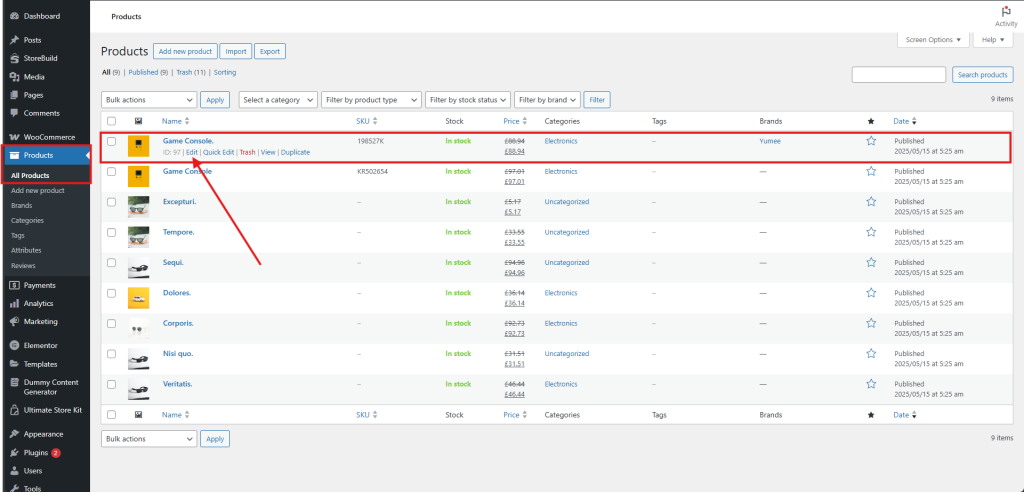
- You can’t change the product title here. To update it, go to WordPress Dashboard >Products > All Products Edit Product and modify the title as required.
- Now, with the product title settings, you have complete control over typography adjustments. Modify the color, font family, size, weight, style, and spacing to craft a design that aligns perfectly with your store’s theme. Fine-tuning letter spacing and line height enhances readability, ensuring a clean and professional look.
- Adding & Styling Product Price
- Now, customize your product price display with flexible styling options. Adjust font, size, color, and typography to match your brand, ensuring clarity and visual appeal.
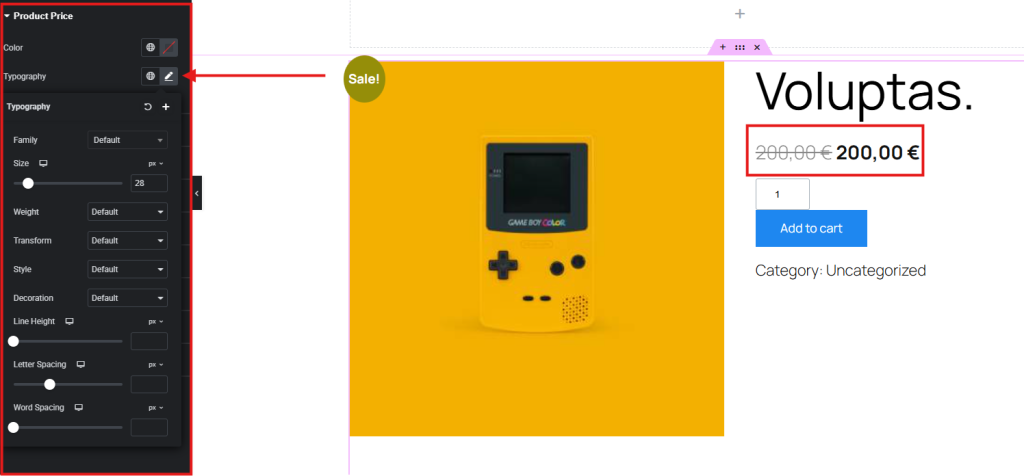
Fine-tune spacing and positioning for better readability, especially for discounts and promotions
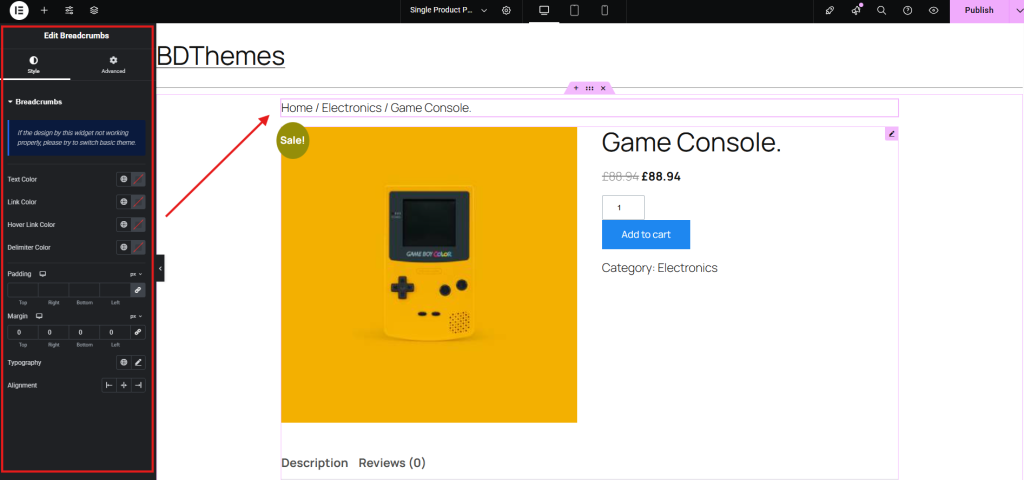
- Implementing Breadcrumb Navigation
- In the left sidebar, find the Ultimate Store Kit (Single) section and select the Breadcrumbs widget.
- Drag & Drop – Place the widget in your desired location on the page.

- Customize – Adjust font, color, spacing, and alignment to match your branding.
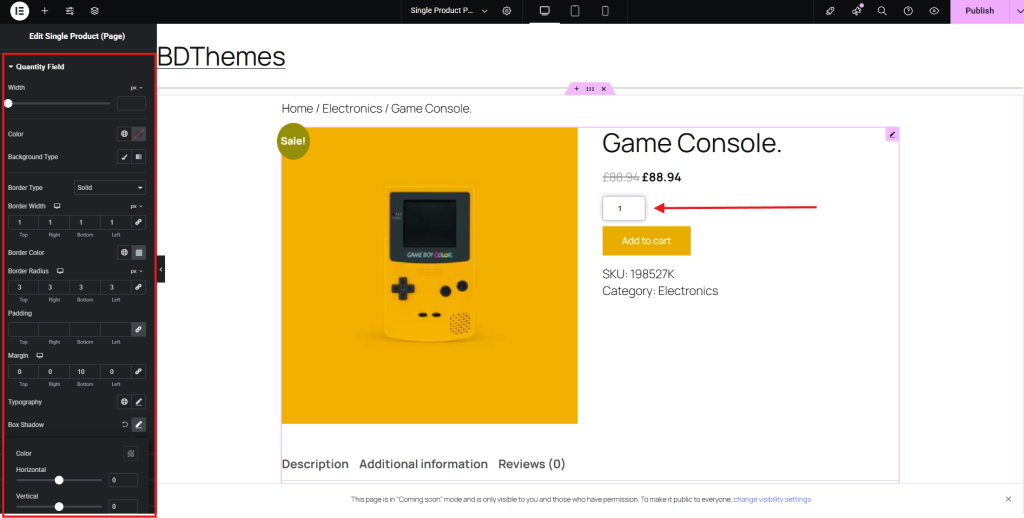
- Set Quantity Field
With Ultimate Store Kit, you can fully customize this field to enhance usability and match your store’s design.
- From the left sidebar, adjust font, color, spacing, and alignment to match your branding.
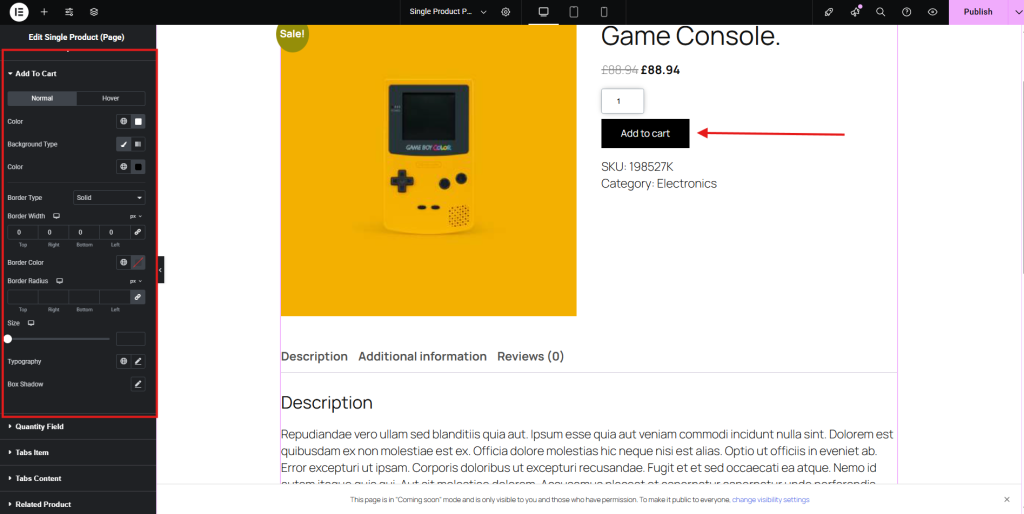
- Add to Cart Button
The Add to Cart button is a crucial element of your WooCommerce product page, designed to drive conversions and enhance user experience. With Ultimate Store Kit, you can fully customize its appearance and functionality to match your store’s branding.
- Using the left sidebar, modify font, button color, size, hover effects, borders, and spacing for a visually appealing design.
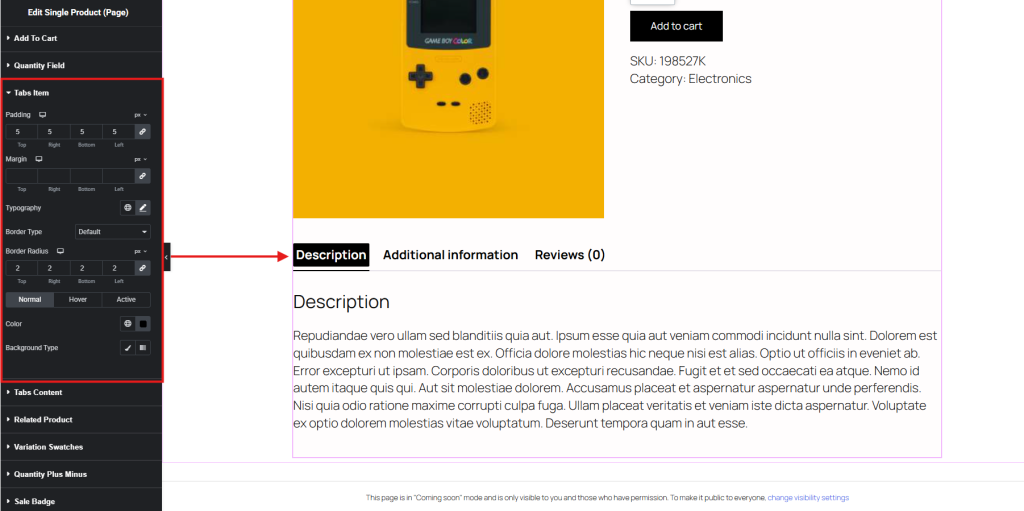
- Tab Items Customize
Customizing Tab Items in Ultimate Store Kit allows you to refine the layout and style of Description, Additional Information, and Review sections, enhancing the user experience.
- Customize your Tab Items effortlessly using the left sidebar. Adjust font, colors, size, hover effects, borders, and spacing to create a polished and engaging design that aligns with your brand.
- Tabs Content
- Modify your Tabs’ Content for Description, Additional information, and Review effortlessly using the left sidebar. Adjust font, colors, size, spacing, and styling to create an engaging and well-structured presentation that enhances readability and user experience.
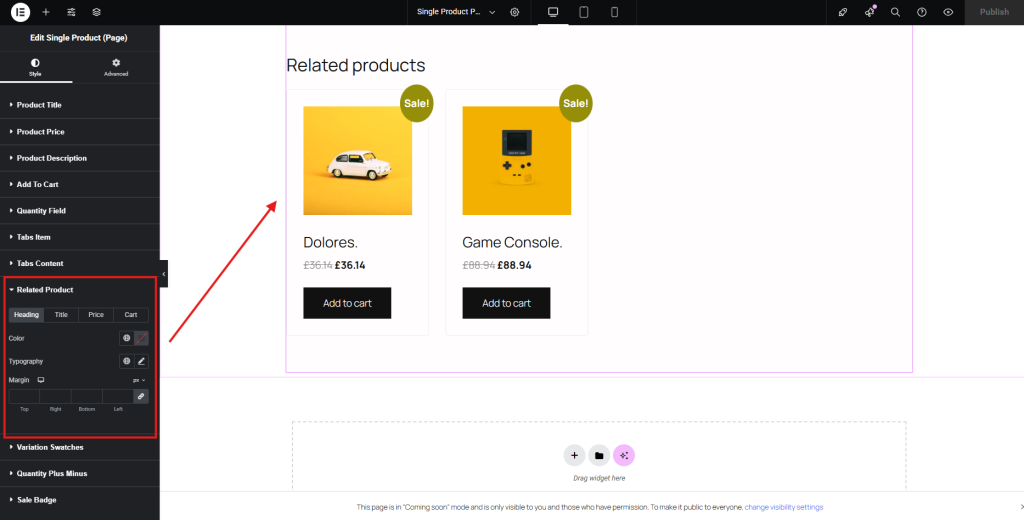
- Related Product Recommendations
Displaying Related Product Recommendations helps enhance user experience and boost conversions. With Ultimate Store Kit, you can customize the way related products appear on your WooCommerce product page.
- Customize the Layout & Styling of the heading, title, price, cart button, font, color, spacing, and hover effects to match your branding.
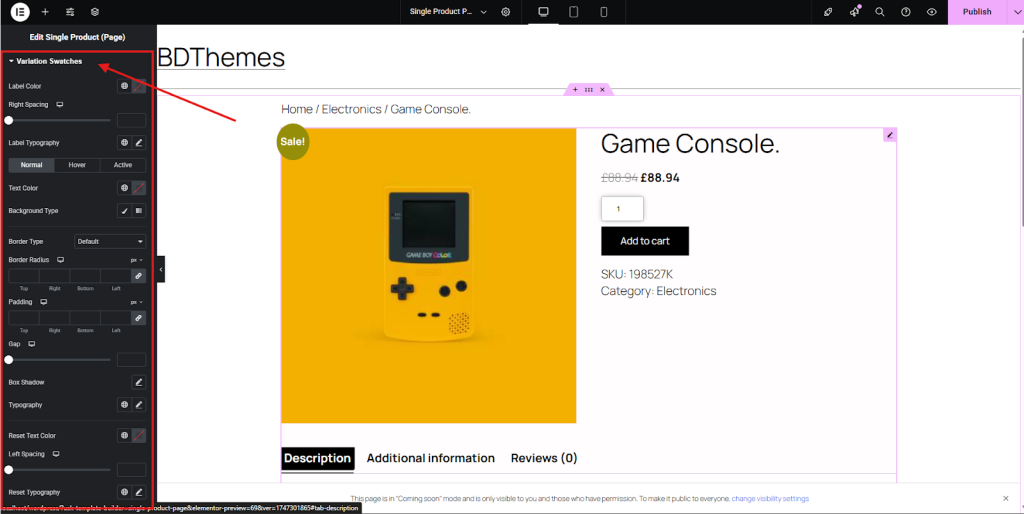
- Variation Switcher
- If you have variations in your products, you can customize your Variation Switcher using the left sidebar. Adjust font, colors, size, hover effects, borders, and spacing to create a polished and engaging design.
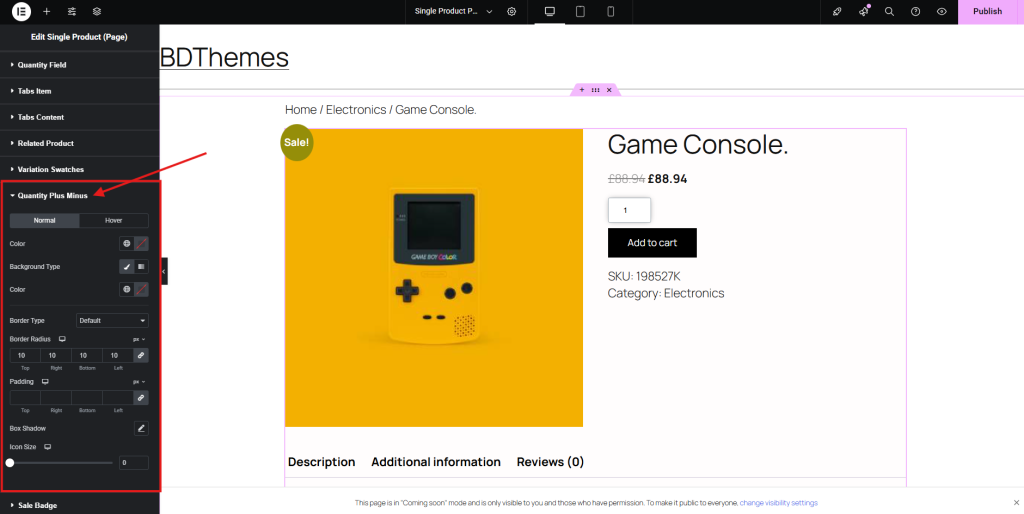
- Quantity Plus Minus
- You can adjust button size, color, typography, spacing, and hover effects of the Quantity Plus Minus option.
- Sale Badge
The Sale Badge in Ultimate Store Kit helps highlight discounted products, increasing visibility and conversions.
- Here, you can modify colors, fonts, size, position, and animation effects to make the discount stand out.
- Advanced Customization
The Advanced Customization options provide full control over your WooCommerce product page design. Here’s a breakdown of what each setting offers:
- Layout: Adjust structure, positioning, and alignment.
- Motion Effects: Add dynamic animations and transitions.
- Transform: Apply scaling, rotation, and other transformations.
- Background: Modify colors, gradients, and images for a visually appealing design.
- Border: Customize border styles, thickness, and colors.
- Mask: Use creative masking techniques for unique visual effects.
- Responsive: Optimize design for different devices and screen sizes.
- Attributes: Add custom attributes for enhanced functionality.
- Custom CSS: Apply advanced styling for a fully tailored appearance.

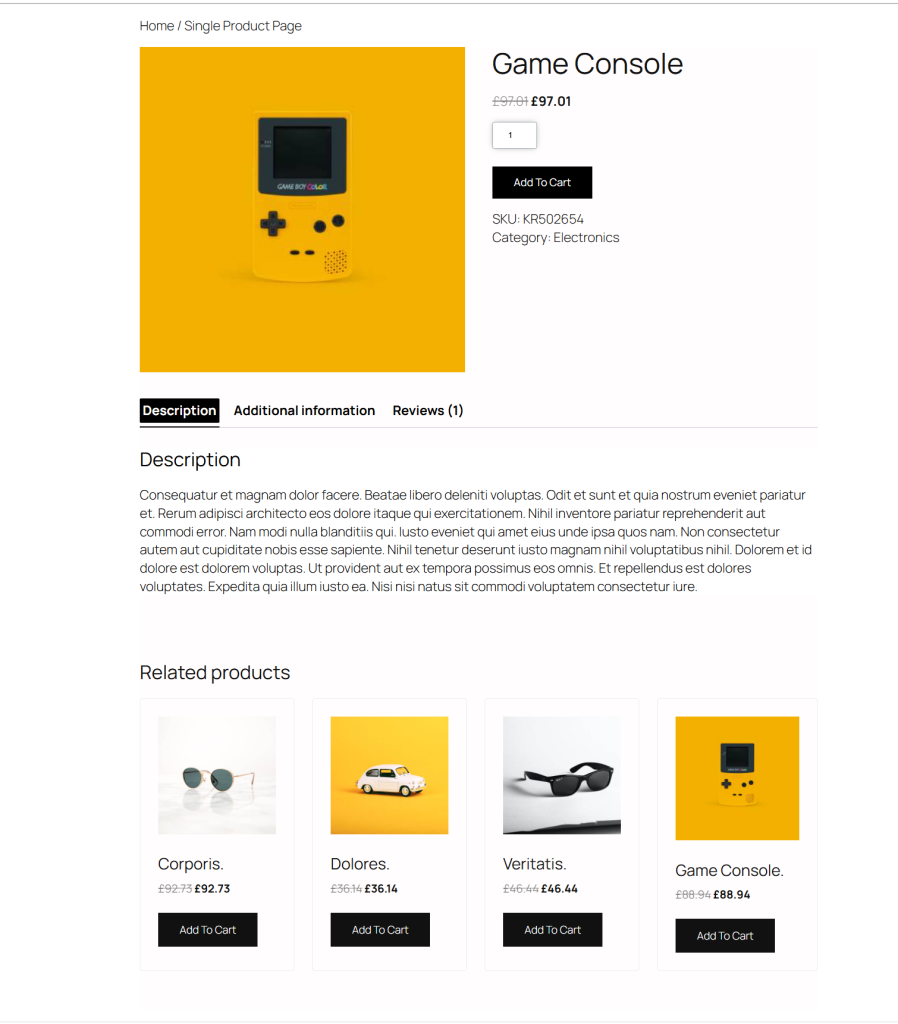
Finally, here’s the complete version of our WooCommerce single product page. It includes all the info that a customer needs to confirm their purchase and is also in the proper layout.

Create a single product page built from scratch
If you prefer not to use a pre-designed template, you can build a single product page from the ground up with Ultimate Store Kit widgets. This approach gives you full control over layout, design, and functionality, allowing you to customize every detail to match your vision.
Arrange elements like product images, titles, prices, and buttons in any order to create a fully personalized shopping experience.
To create a single product page from scratch using Ultimate Store Kit, follow these steps:
- Navigate to Ultimate Store Kit > Template Builder.
- Create a New Template – Click on Create and then select Add New Template.
- Edit with Ultimate Store Kit – Open the template for customization.
- Use Ultimate Store Kit Widgets – Drag and drop widgets like product title, images, price, add-to-cart button, tabs, and more to design the page.
- Customize Layout & Styling – Adjust typography, spacing, colors, and responsiveness to match your brand.
SEO Optimization Tips for WooCommerce Single Product Page
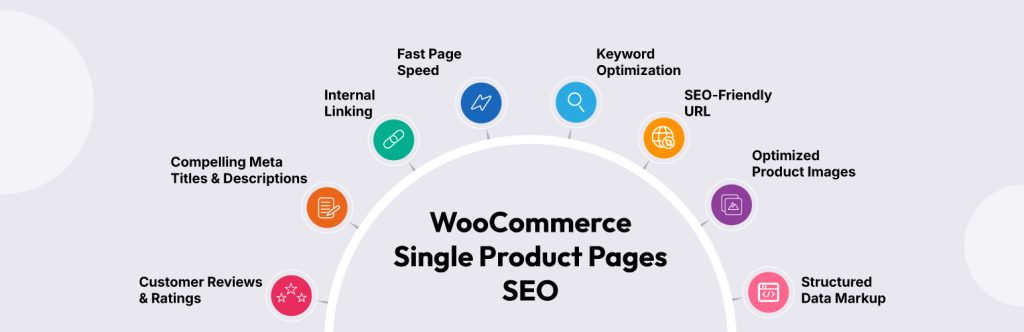
Optimizing your WooCommerce single product page for SEO ensures higher visibility and better rankings on search engines. Here are key strategies to smooth performance:
- Keyword Optimization: Use relevant keywords in product titles, descriptions, and meta tags.
- SEO-Friendly URLs: Keep URLs concise and include target keywords for better indexing.
- Optimized Product Images: Use high-quality images with alt text to improve accessibility and search ranking.
- Structured Data Markup: Implement schema to help search engines understand your product details.
- Compelling Meta Titles & Descriptions: Write clear and engaging meta content to attract clicks.
- Internal Linking: Connect related products and categories to improve site navigation.
- Mobile-Friendly Design: Ensure your product pages load smoothly and are responsive across all devices.
- Fast Page Speed: Optimize WooCommerce product page Speed, optimize images, scripts, and caching to enhance loading time.
- Customer Reviews & Ratings: Encourage user-generated content to boost credibility and SEO.
Final Words
Creating a single product page in WooCommerce with Ultimate Store Kit gives you full control over design and functionality. Whether you build from scratch or customize a pre-designed template, each detail helps shape and create a single product page
FAQs
Here’s a Frequently Asked Questions (FAQ) guide on WooCommerce Single Product Page Design, addressing common queries and providing useful insights:
- How to create a product page in WooCommerce?
You can create a product page in WooCommerce by adding a new product under Products > Add New, then defining details like title, description, price, and images.
- How can I design a single product page in WooCommerce for free?
Use free tools like Ultimate Store Kit or the built-in WooCommerce editor to structure and customize your product pages without extra costs.
- Can I create a unique design for each WooCommerce product page?
Yes! With Ultimate Store Kit, you can customize each product page individually.
- How do I improve WooCommerce product page SEO?
Focus on keyword optimization, structured data, fast page speed, compelling meta descriptions, and mobile-friendly design.
- How to customize the WooCommerce single product page programmatically?
Use WooCommerce hooks and PHP templates to implement specific modifications in your product page layout and functionalities.
Please do not hesitate to leave any questions or comments in the space provided below. Wishing you all the best!
If this article resonated with you, remember to subscribe to our newsletter for more captivating articles, updates, and special offers sent straight to your inbox. Furthermore, follow us on Facebook, X, and YouTube to keep yourself informed.