

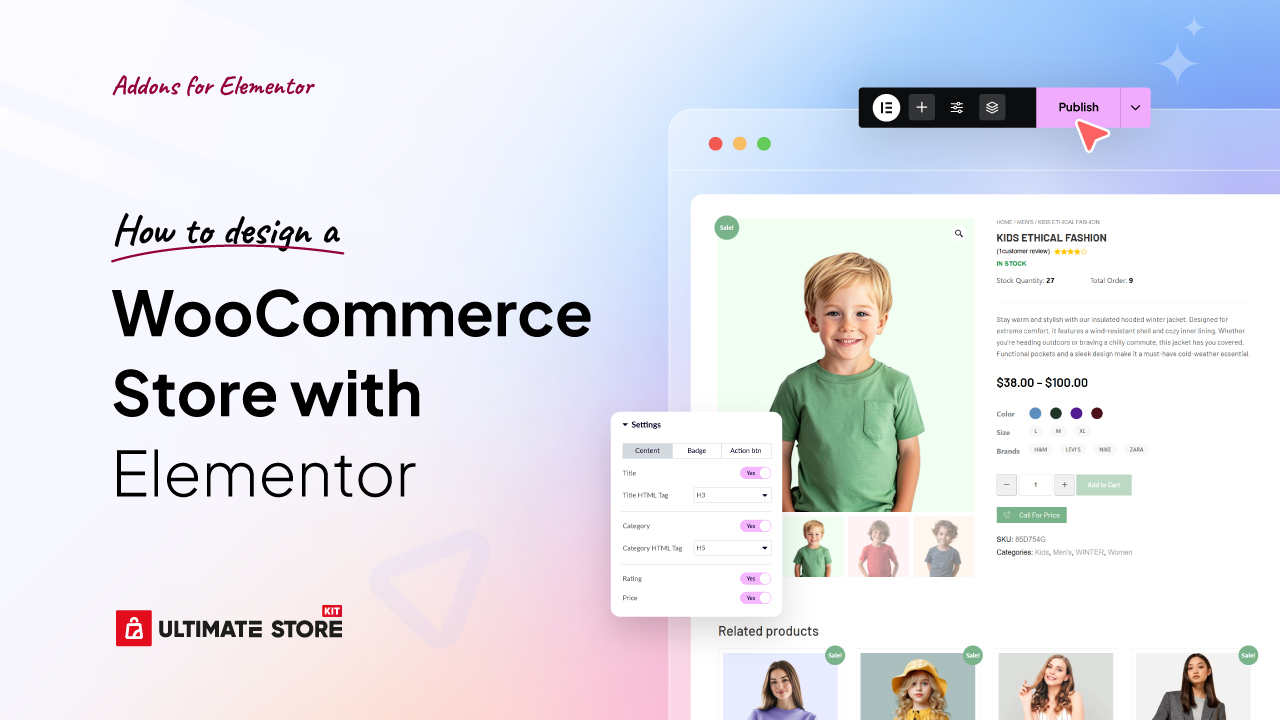
Want to build a customer-friendly and attractive WooCommerce store without coding with Elementor? We know Elementor makes it easy, but many users struggle due to a lack of proper guidance. Plus, some essential features are locked behind the premium version, limiting creative freedom.
But don’t worry, in this blog, we’ll show you how to design a WooCommerce store with Elementor with exciting widgets.
5 Steps to Design a WooCommerce Store with Elementor
Designing a WooCommerce store involves several key steps to ensure a smooth setup and quality design. Here’s a structured approach:
- Step 1: WooCommerce Shop Page Design
- Step 2: WooCommerce Single Product Page Design
- Step 3: WooCommerce Cart Page Design
- Step 4: WooCommerce Checkout Page Design
- Step 5: Order Receive Page Design
So without further ado, let’s start step by step.
Step 1: WooCommerce Shop Page Design
To design a WooCommerce Shop Page with Elementor, you have to face some limitations, such as feature limitations, a premium required, and unlimited design variants.
So, to use extra free features and WooCommerce templates, we’ll use the Ultimate Store Kit Free plugin. It removes Elementor’s limitations, giving you access to premium-level store design without the extra cost.
So, first of all, install and activate Ultimate Store Kit on your WordPress site to get started.
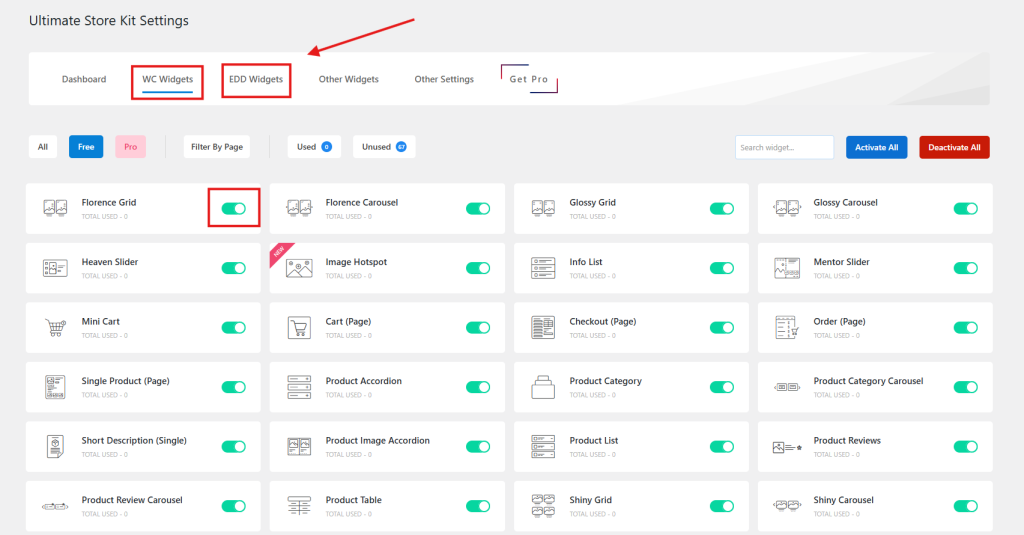
Now, time to set up Ultimate Store Kit. Navigate to Ultimate Store Kit >WC Widget or EDD Widget tabs in the Ultimate Store Kit dashboard to activate and manage the widgets suitable for your store.
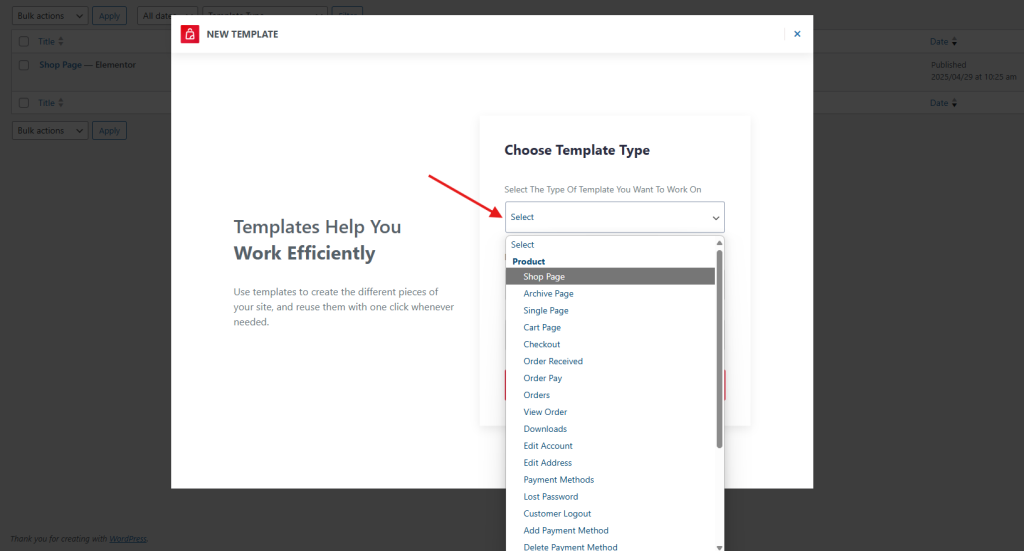
Now we will design the shop page. Go to Ultimate Store Kit > Template Builder in the sidebar. Create a new template by clicking Add New Template > Choose the type of template > Shop Page
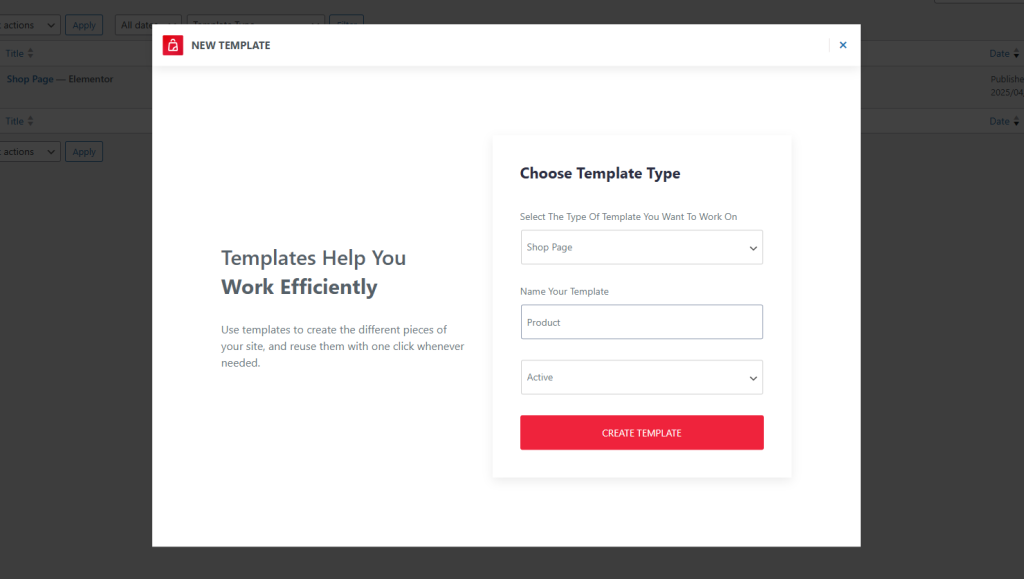
Type the name of your template and select active, then press the Create Template button.
Now, the template will be open with the Elementor editor. From the left side bar, drag and drop widgets onto the layout.
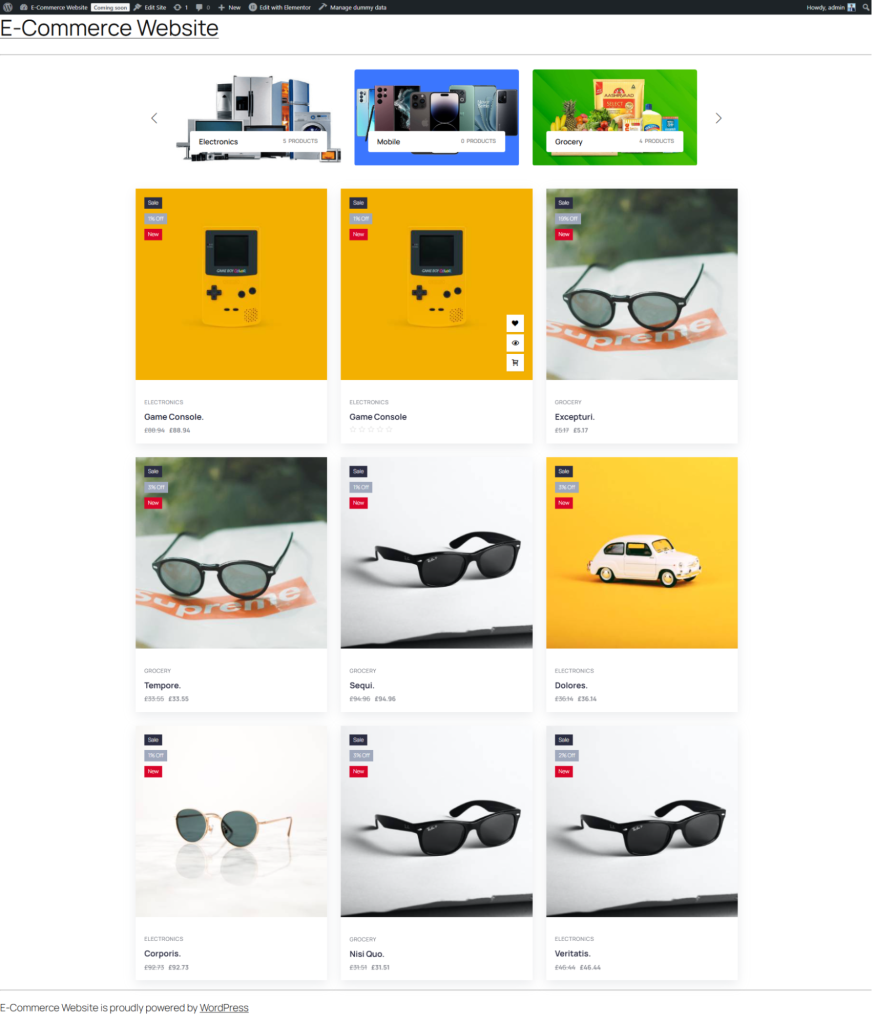
Here I’m showing you a Florence Grid to create a shop page as an example.
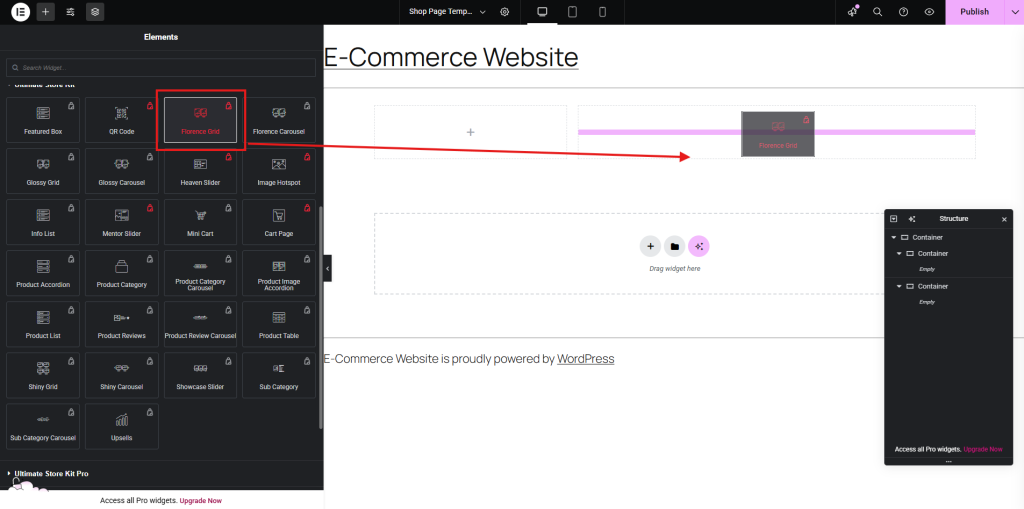
Then the basic interface of a shop page appears.
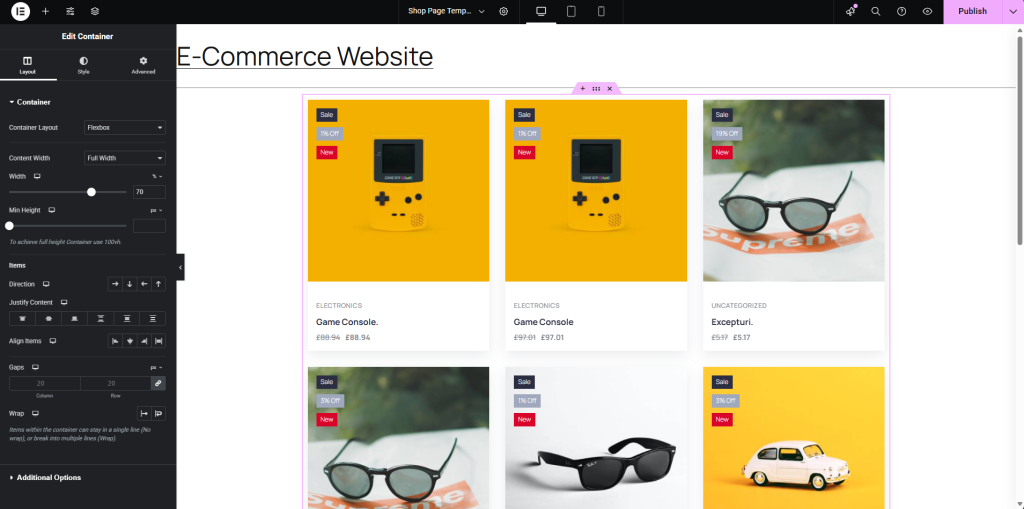
On the sidebar, you will get the Ultimate Store kit widgets. Use the editor’s widgets to drag and drop widgets onto the layout for more customization. Also, design and customize as desired from the Edit Container side bar. Then, publish and check the shop page.
Step 2: WooCommerce Single Product Page Design
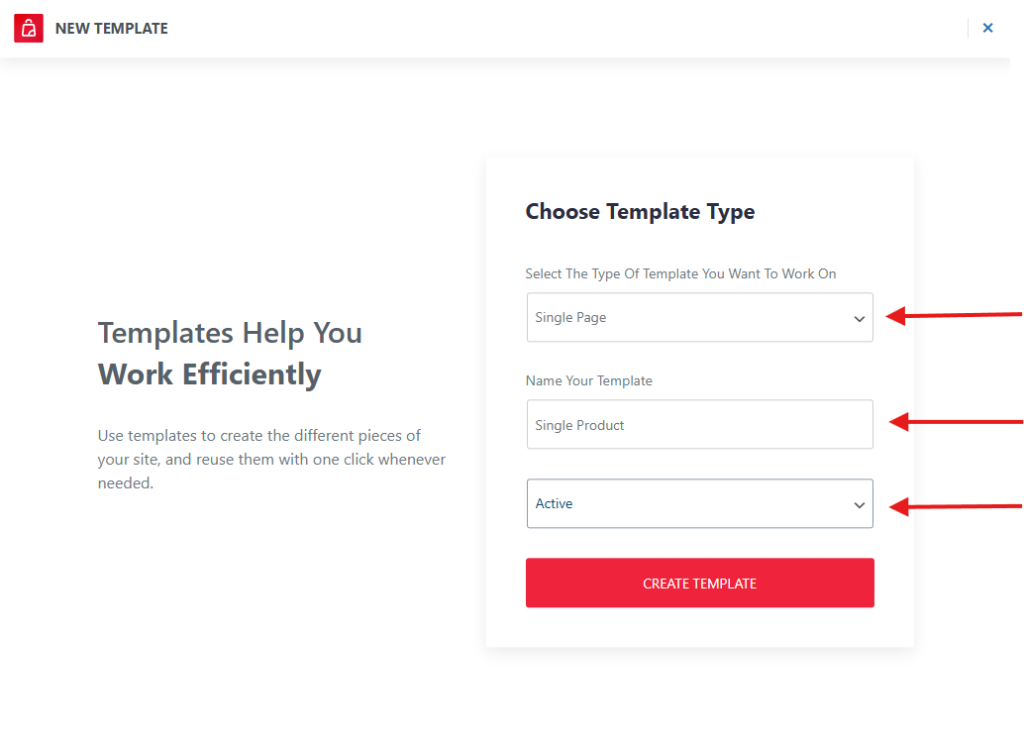
Since we are again using the Ultimate Store Kit template to design a single product page, let’s first set up a template.
Go to Ultimate Store Kit > Template Builder >Add New > Choose Template Type > Single Page, name your template, and hit Create Template.
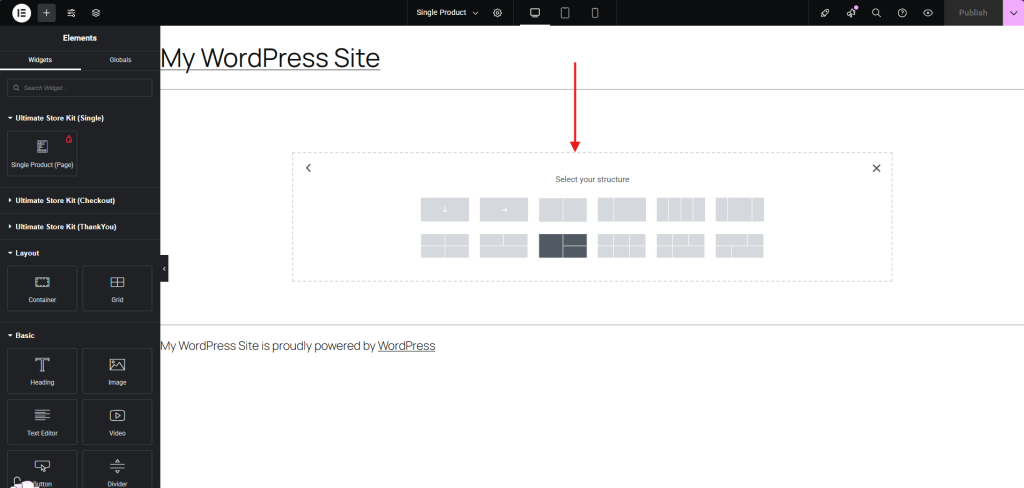
The template opens in Elementor Editor for customization. Choose a layout structure that fits your store’s style.
Use widgets or the ready-made single product page from Ultimate Store Kit for a quick setup.
This is how it will look by default, a ready-made single page, but you can customize each element and layout as you like.
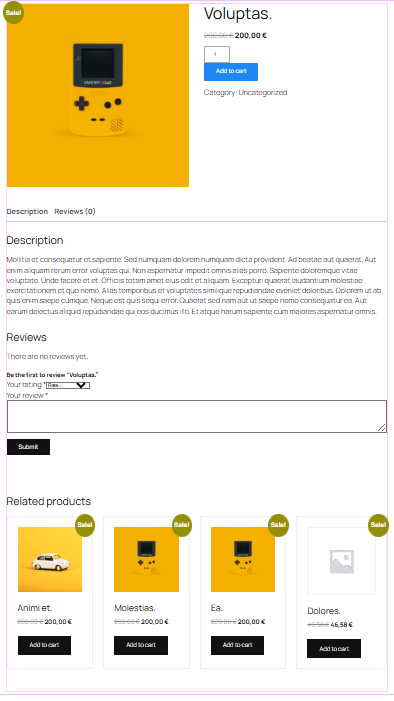
Now, design & Style Your Product Page and customize product elements—title, pricing, tabs, related products—with 80+ widgets. Fine-tune typography, colors, spacing, and layout for a sleek, professional design.
For an in-depth breakdown, dive into our complete blog, How to create a single product page in WooCommerce, packed with expert insights, step-by-step guides, and pro tips to create your WooCommerce Single Product Page Design.|
Step 3: WooCommerce Cart Page Design
In this step, we will create a cart page, so go to Ultimate Store Kit >Template Builder in the sidebar. Create a new template by clicking Add New Template > Choose Type of Template > Cart Page.
Type the name of your template and select Active, then press the Create Template button.
Now, the template will be open with the Elementor editor.
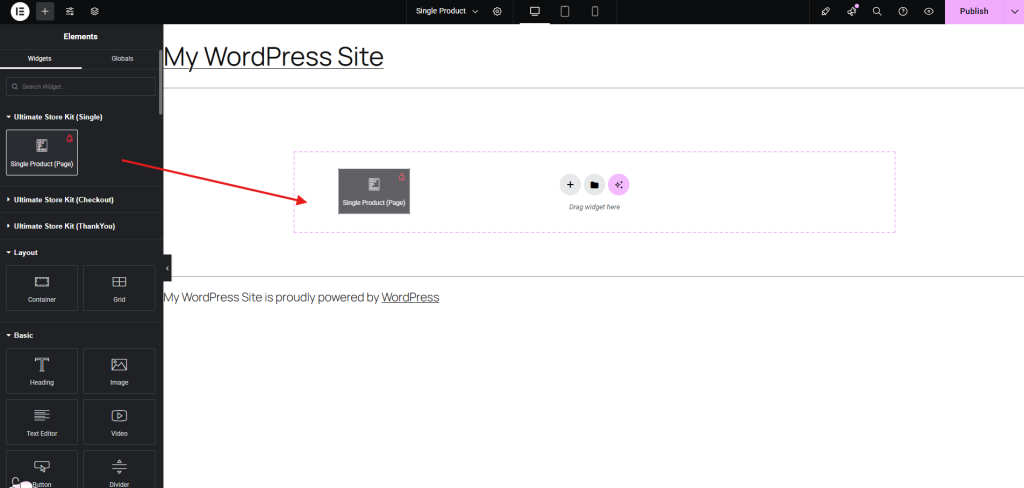
In the Elementor editor, find the Ultimate Store Kit section where various eCommerce-related widgets are listed. The Cart Page widget is highlighted in the image.
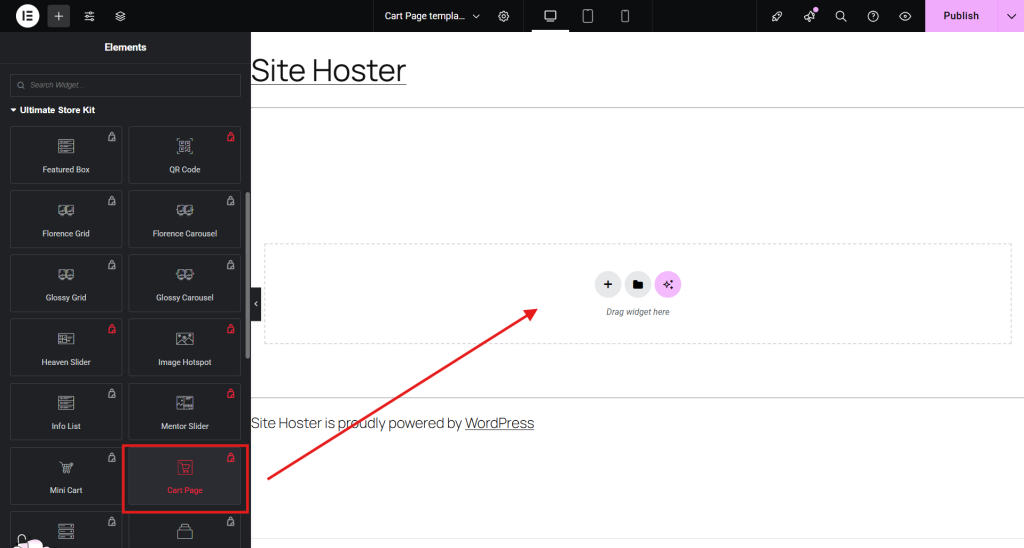
Click and drag the Cart Page widget to the main editing area where it says “Drag widget here.” This action places the widget on the cart page layout, allowing you to customize the design and functionality.
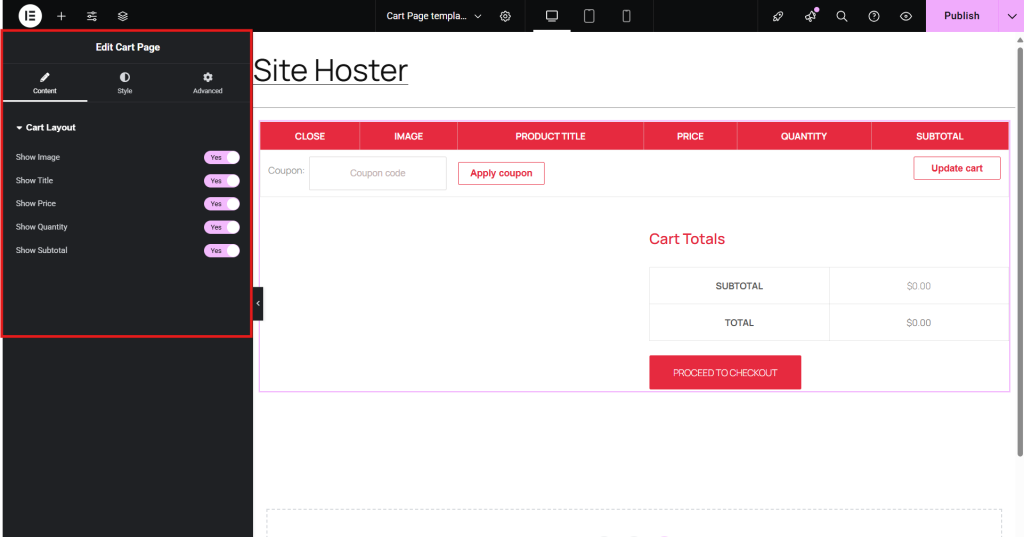
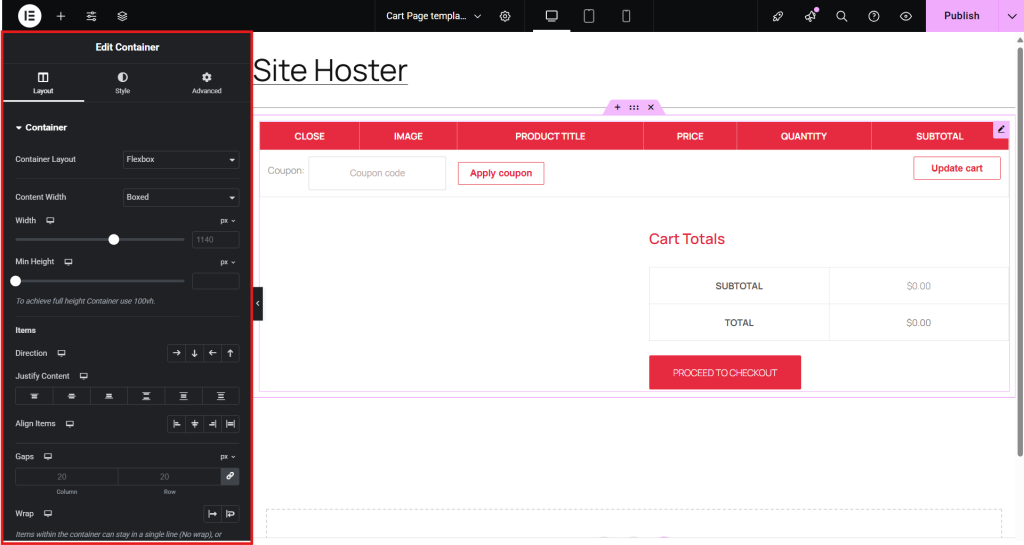
After adding the widget, you can adjust styling, layout, and display options within Elementor to match your store’s theme and branding.
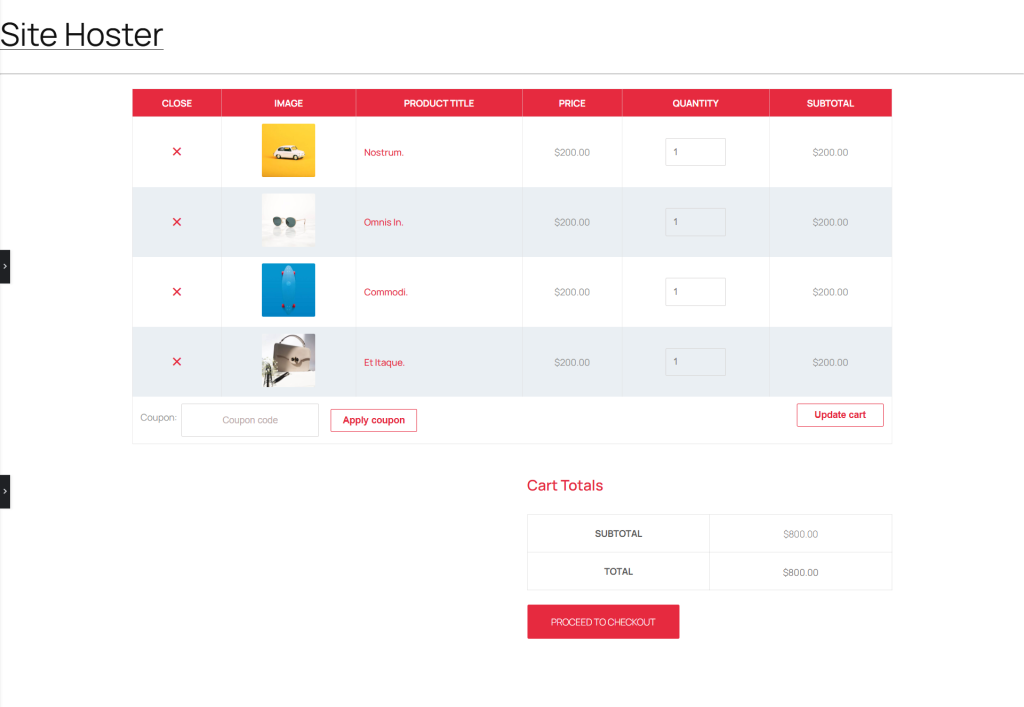
Once satisfied with the design, click the Publish button to save and apply your changes. The cart page is now updated with the Ultimate Store Kit’s enhanced cart functionality.
Step 4: WooCommerce Checkout Page Design
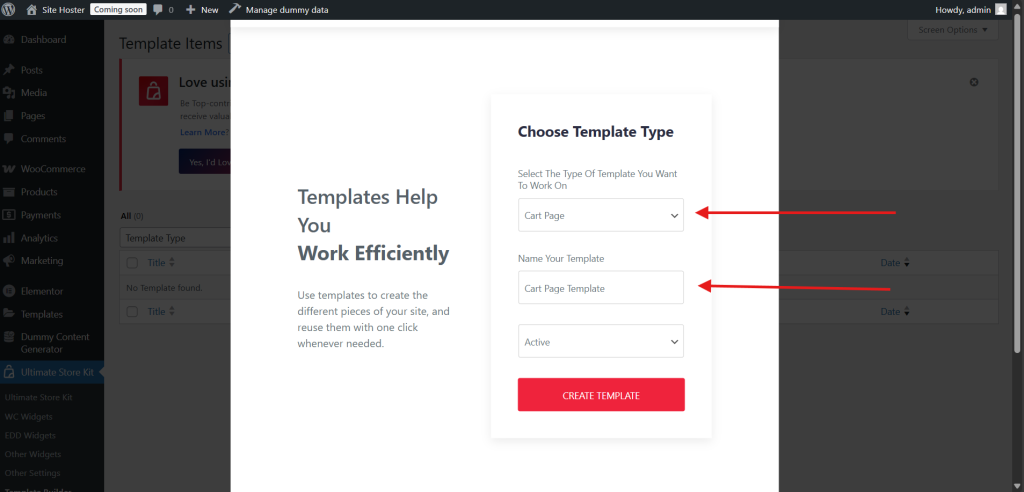
This step in designing the WooCommerce Checkout Page. As before, to create a checkout page, you need to create a template. So, go to Ultimate Store Kit > Template Builder > Add New Template > Choose the type of template > Checkout Page.
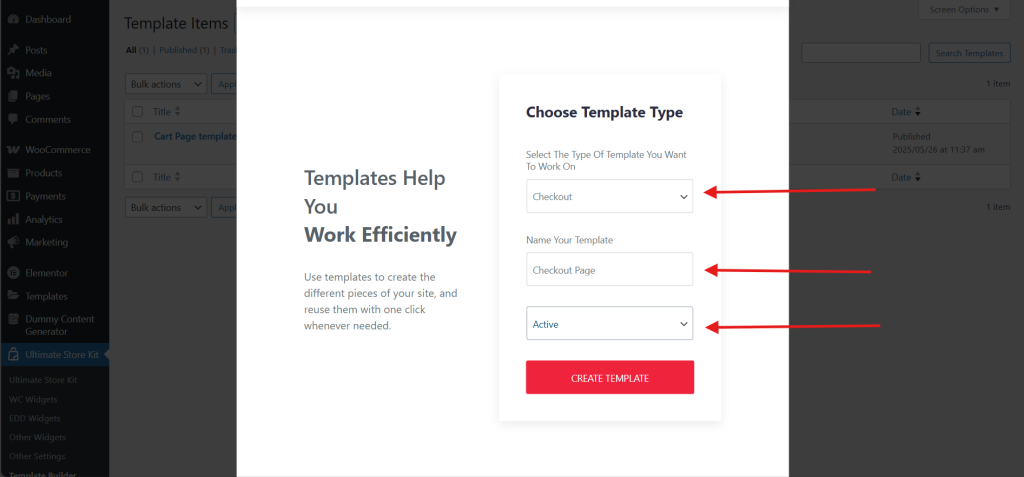
Type the name of your template and select Active, then press the Create Template button.
Now, the template will be open with the Elementor editor.
Then locate the Ultimate Store Kit section in the sidebar. Look for the Checkout Page widget among the available options.
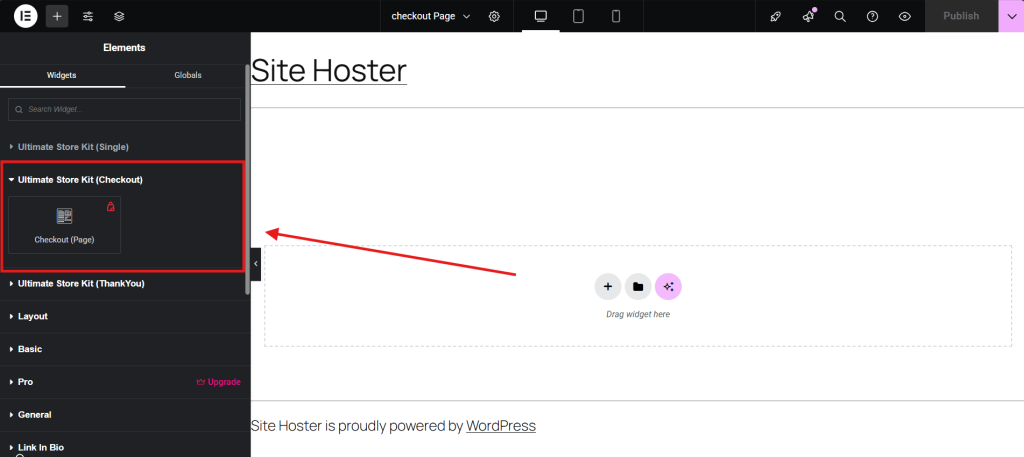
Select the Checkout Page widget and drag it into the designated area where you want the checkout form to appear.
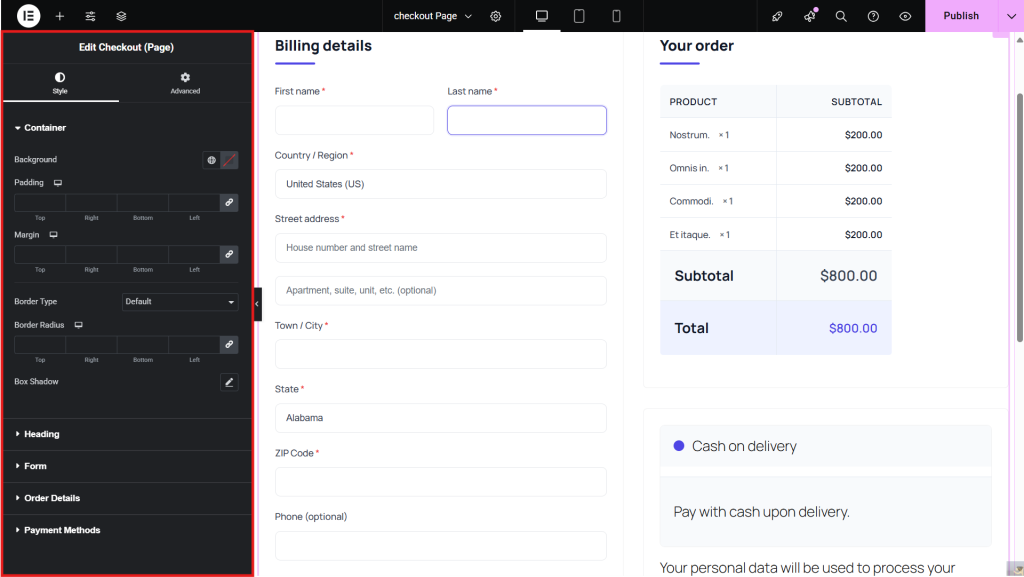
Once placed, customize the settings such as field arrangement, button styling, and responsiveness to ensure it matches your website’s design and branding.
Depending on the widget’s customization options, you can add express checkout buttons, adjust payment gateway displays, and refine the overall checkout experience.
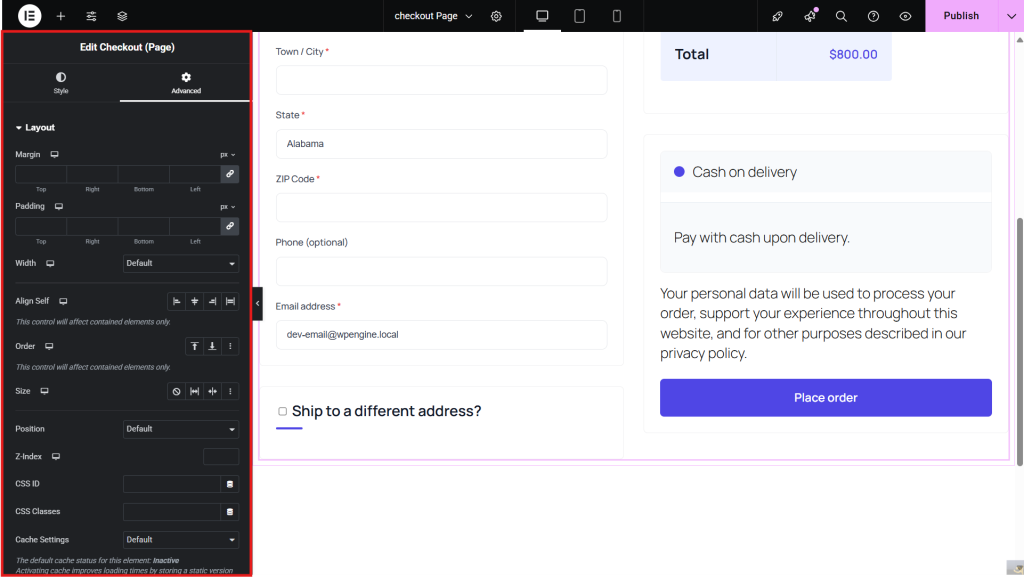
Once your checkout page layout is finalized, click Publish to apply the changes. Customers will now see a structured, user-friendly checkout process designed using Ultimate Store Kit.
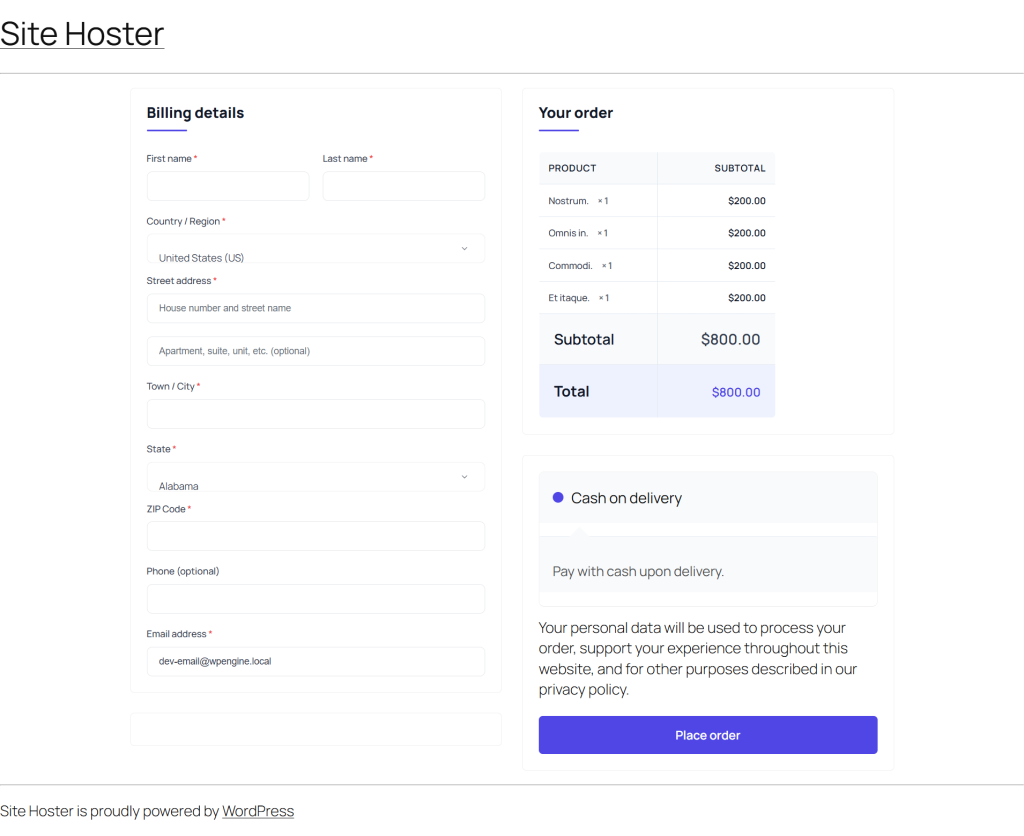
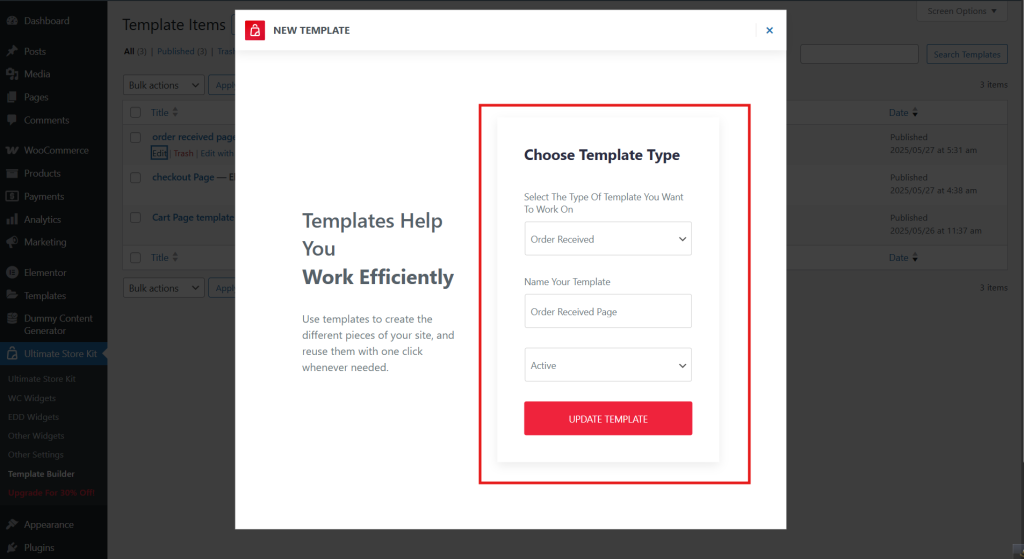
Step 5: Order Receive Page Design
Now, to design the Order Receive Page, you need to create a template. Navigate to Ultimate Store Kit > Template Builder > Add New Template.
Choose the template type as Order Receive Page. Enter a name for your template, mark it as Active, and click Create Template. The template will now open in Elementor Editor.
In the Elementor sidebar, locate the Ultimate Store Kit section. Find the Order Receive widget among the available options.
Drag the Checkout Page widget into the designated area where you want the checkout form to appear.

Adjust field arrangement, button styling, and responsiveness to align with your website’s design and branding.
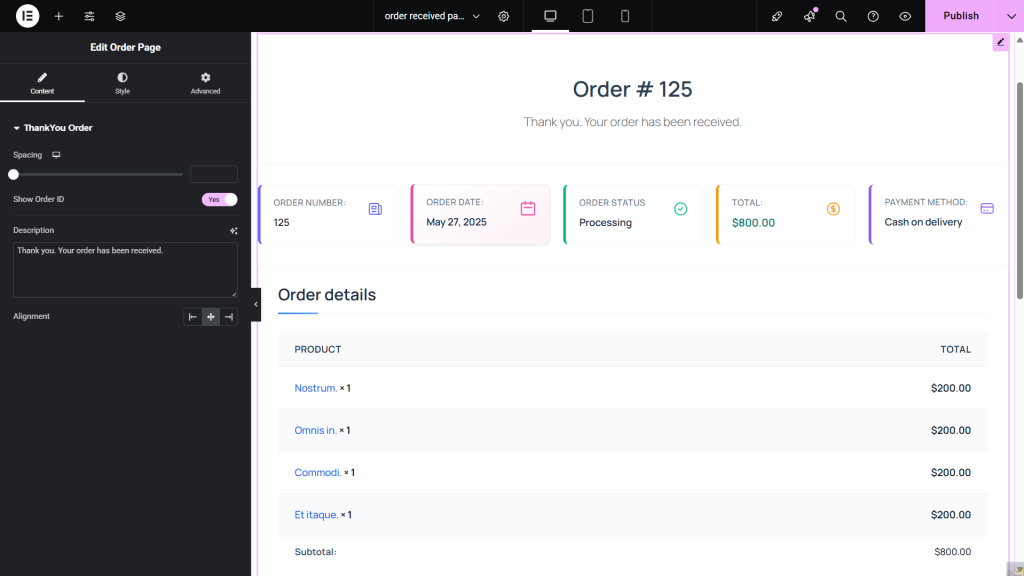
Utilize widget customization options to enable express checkout buttons, modify payment gateway displays, and enhance the overall checkout experience.
Once satisfied with the Order Receive page layout, click Publish to save the changes.
Bonus: Optimization Tips for WooCommerce Store
Optimizing your WooCommerce store is crucial for performance, user experience, and conversions. Here are some key strategies:
Improve Site Speed
- Implement caching to reduce load times.
- Optimize images using compression tools.
- Minify and optimize CSS and JavaScript files.
- Use a Content Delivery Network (CDN) to serve assets faster.
Optimize WooCommerce Database
- Regularly clean up transients, revisions, and unused data.
- Use database optimization plugins like WP-Optimize.
Optimize WooCommerce Plugins & Themes
- Use lightweight themes designed for speed.
- Remove unnecessary plugins and keep only essential ones.
SEO & Mobile Optimization
- Ensure your store is mobile-friendly.
- Optimize product pages with structured data for better search visibility.
Frequently Asked Questions:
1. Can I use Elementor and WooCommerce together?
Yes! Elementor works smoothly with WooCommerce, allowing you to design and customize store pages visually.
2. How do I customize my WooCommerce store?
Use Elementor for WooCommerce widgets, tweak shop pages with the theme builder, and add plugins like Ultimate Store Kit for advanced styling.
3. How to Create a WooCommerce Shop Page with Elementor (Free)
– Open a new page in Elementor.
– Use the Products widget to display items.
– Manually add filters and a search bar.
– Customize the layout and publish as your Shop page.
4. How do I add a custom field to a single WooCommerce product page?
– Use plugins like Advanced Custom Fields or WooCommerce Product Options for easy field additions.
– Add custom fields via functions.php using WooCommerce hooks like woocommerce_product_meta_end.
5. How do I customize my WooCommerce product listing page?
– Modify settings under Appearance > Customize > WooCommerce > Product Catalog.
– Use Elementor or WooCommerce Blocks to visually design product grids.
– Apply custom CSS or hooks to tweak product display layouts.
Conclusion
Through this blog, we have tried to show you the process of designing a fully functional WooCommerce store using Elementor.
From setting up shop pages to order receive page layouts, we’ve covered essential steps to help you build a store that aligns with your goals. With the right tools and strategies, you can create an efficient and user-friendly e-commerce store.
We hope this guide has provided valuable insights and practical steps to build your WooCommerce store with confidence.
Please do not hesitate to leave any questions or comments in the space provided below. Wishing you all the best!
If this article resonated with you, remember to subscribe to our newsletter for more captivating articles, updates, and special offers sent straight to your inbox. Furthermore, follow us on Facebook, X, and YouTube to keep yourself informed.